
As an e-commerce owner, balancing social media with your business can be a challenging task. Especially if you have no idea how to create content, design creatives, then this process becomes multi-fold difficult. But in this era of AI, you do not have to worry about roadblocks such as this.
Because AI tools have started to become smarter, that with a few simple steps you can stick to your posting schedule without much of a hassle. And that is exactly what we are going to be doing in this blog: showing you how you can automate your ecommerce product posts with an AI tool!
But why should you use AI tools in your content creation process?
Using AI in your content creation process can help you halve your efforts while getting the same benefits.
60% of US companies use Generative AI Solutions in their content creation process to maintain their social media presence. And with social media platforms ramping up the pressure on accounts to post consistently or getting their engagement slashed, some assistance from AI tools can become a lifesaver.
With AI tools, you can:
- Generate content ideas even when your creative juices are at 0%
- Come up with captions and video scripts within a matter of minutes
- Get posts designed according to your preference, with something as simple as a text prompt
- Batch create content and test multiple variations to ensure the best version gets posted
- Reiterate the creative process as many times as you want and still get results quickly
- Save time and resources that would have otherwise gone into the traditional content creation process
It is a safe idea to place your bets on an AI tool and make your content creation process much smoother and quicker!
Step-by-Step process of creating product posts with AI tools
Okay, let us get down to business. You want product posts for your e-commerce social media account. So, there is no need to spend time on idea generation or anything else. We can straight up dive into the creation process.
While many tools in the market can help you with these posts. There is only one that has everything we want: an affordable price, versatile features, a good support system, and a user-friendly process, which is Predis AI!
Making a Product Post with Predis AI
And these are the exact steps you need to take to create a product post from scratch:
- Sign up for Predis AI and get a new account if you are a new user
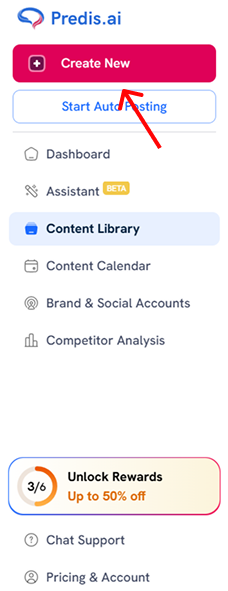
- Next up, you will be navigated to the main screen, where you can click on the “Create New” button to start making a new post.
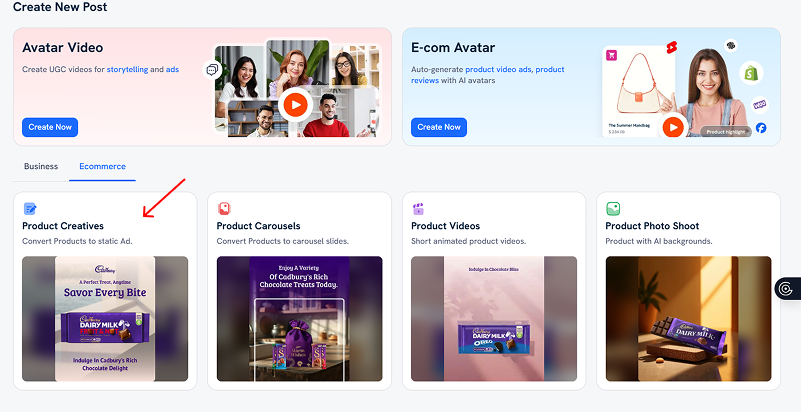
- After which, you will be shown to a screen where you can pick the kind of post that you want to create. If you look closely, there is a whole e-commerce section with different types of media within it. Remember, how we mentioned this tool to be versatile, this is what we meant by that.
- In this list, you can choose whichever post type you want to make. But since our goal is to create a product post, we will be selecting the “Product Creative” option. This will create a static image for your product.
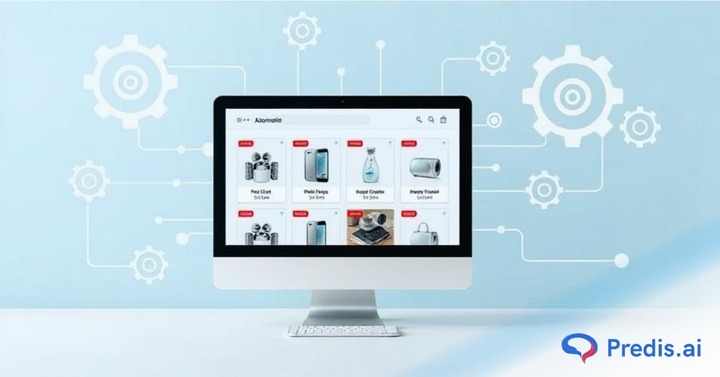
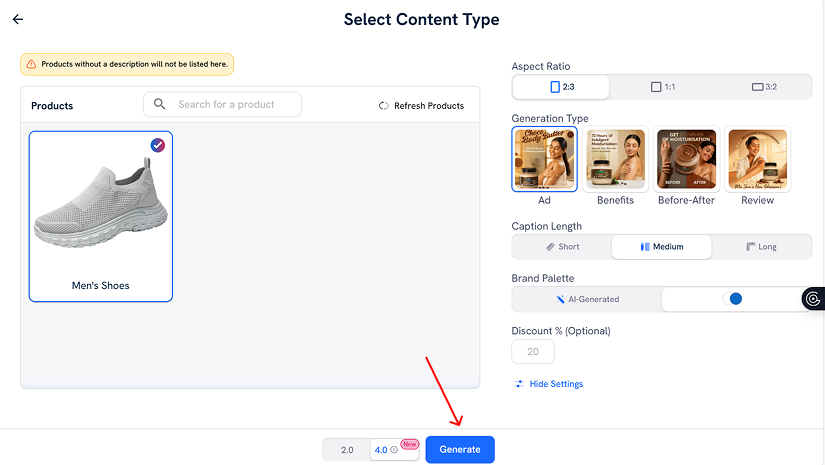
- In the next screen, you will be prompted to link your e-commerce account or upload a CSV of the product to start making the content. If you have your e-commerce shopfront linked, then the products will be automatically pulled and showcased like this:
- Pick the product that you want to create the post for, choose the aspect ratio, and the post type. You can also customise the caption length and the brand palette based on your preference.
- Once you have chosen the right options, you can click “Generate”, and the post will be created for you in a few seconds.
How to create Ecommerce video posts for your products with Predis AI?
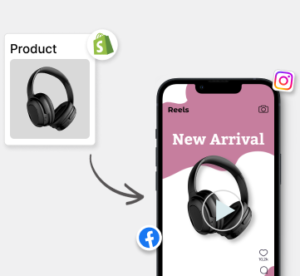
Let us take it up a notch. What if you don’t want to do boring product images, but instead would like to do flashy videos that can get your audience hooked? Worry not, because Predis AI has something for you, too.
There are multiple types of videos that you can create with Predis AI. It can be normal product videos or Avatar videos, where a human-like AI figure will talk about your product. Think UGC videos but with an AI presenter.
Now the normal video is pretty straightforward to make, and it is similar to the process that we saw above: you click “Product videos”, input the same details, and boom! You have a video in hand.
But the avatar video takes a couple more steps to be social-media ready. So, let us check out how you can get that done!
Making AI avatar product videos with Predis AI
Now, to make an avatar video, follow these steps:
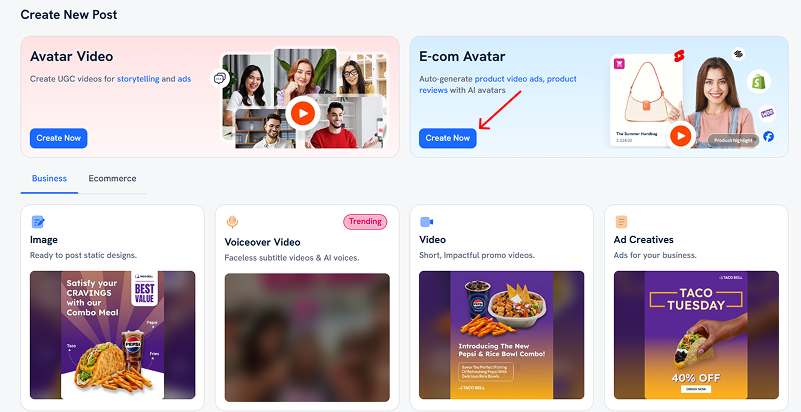
- After clicking “Create New”, you would be shown several content types to pick from. Out of which, select the “E-com Avatar”.
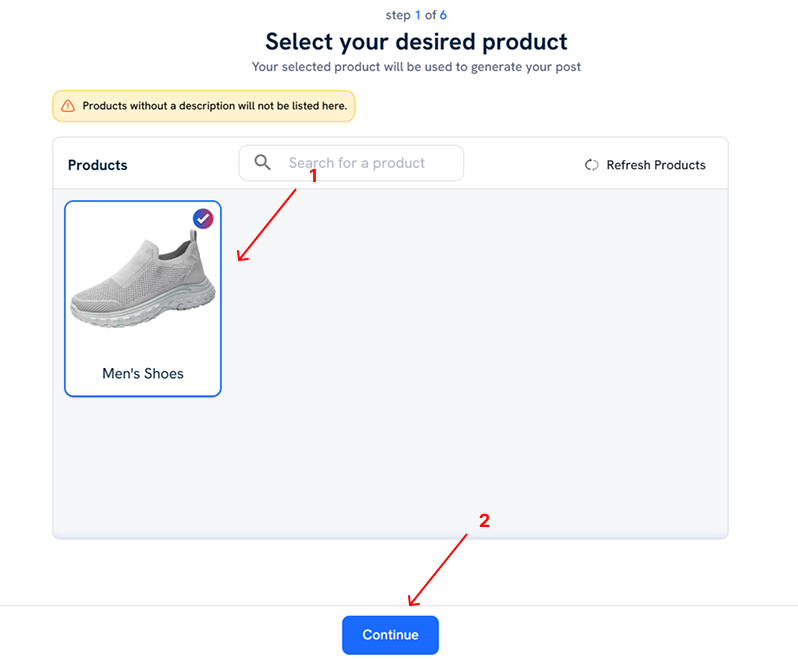
- Make sure to connect your e-commerce account at this step, if you have not already done so. But if your account is already connected, then your products will be showcased for you to pick from. From those, choose the product that you want to proceed with.
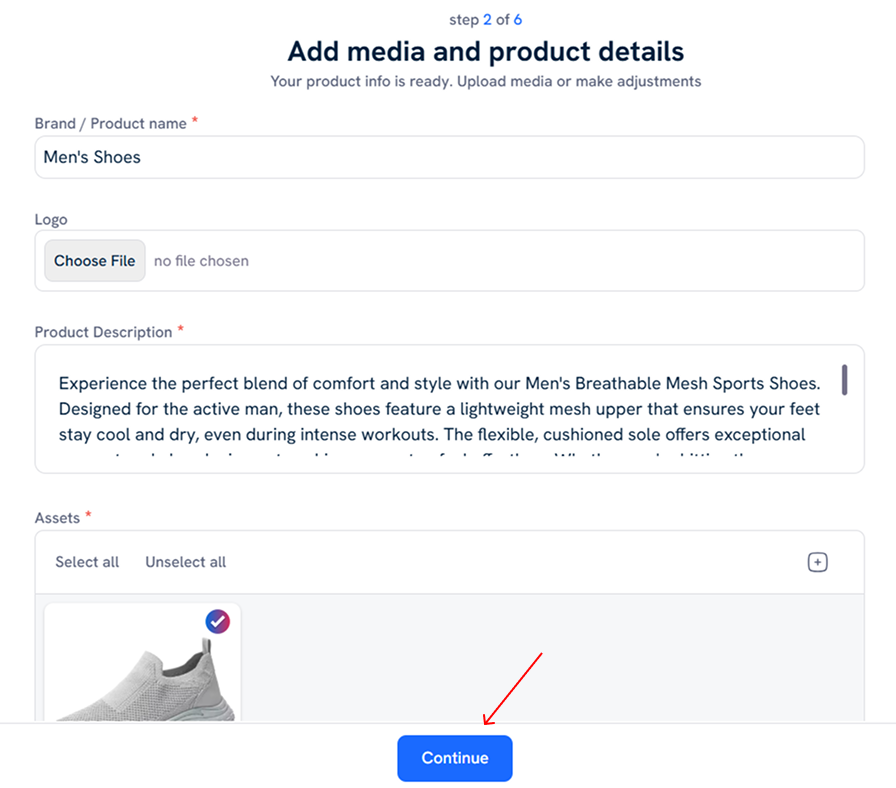
- The details about your product will automatically be pulled from the page, and the fields will be auto-populated. You can also add promotional details about the products, such as original price, promo price, and so on.
- In the next screen, you have to pick the aspect ratio of the video, duration, and also the target audience that this video is intended for.
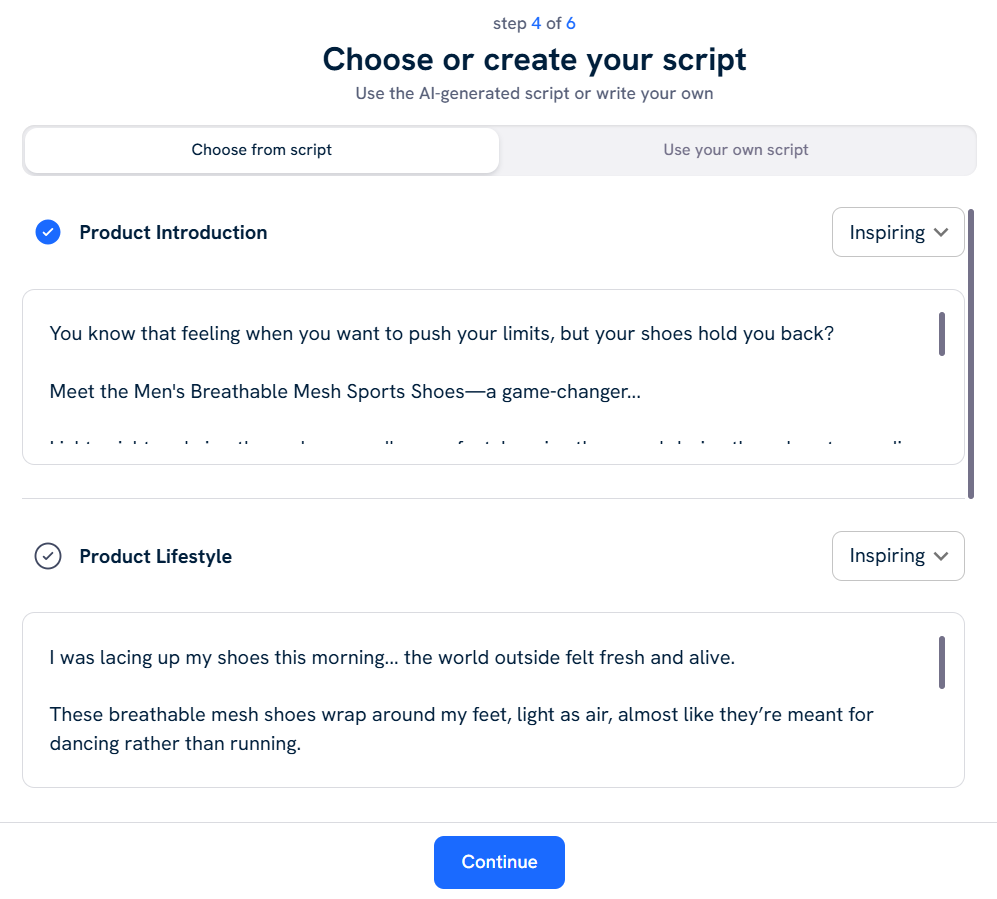
- Based on what you have provided, the AI will automatically generate scripts in multiple tones. You can pick the script that you like, or you can use your own script.
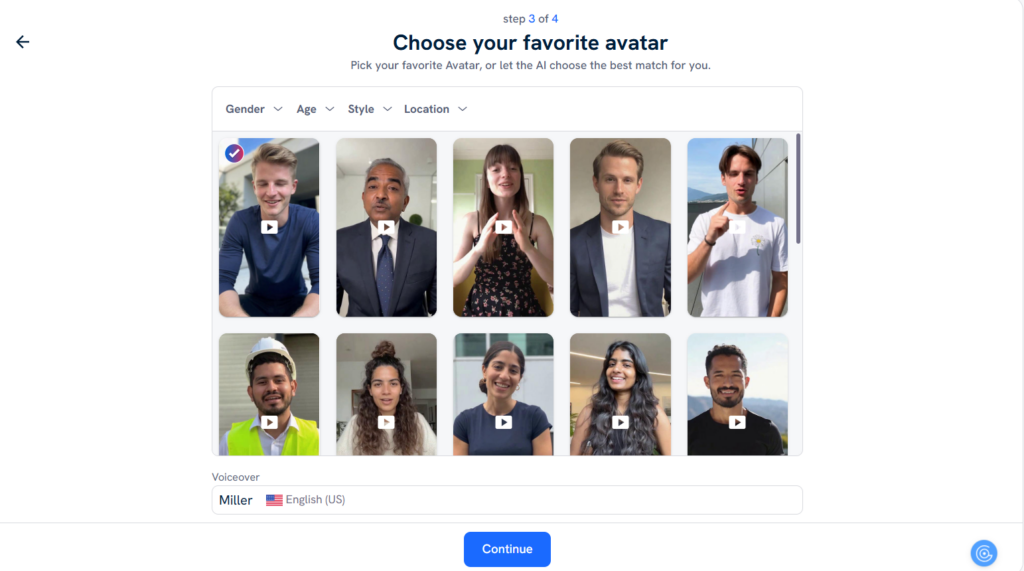
- Now comes the interesting part, that is selecting the avatars! Browse through their avatar library and pick one that you like the most. The avatar will come with a voice of its own, but you can always mix and match.
- The last and final step is to choose the template for the video. Do you want your avatar to be sitting on a sofa in the video? There is a template that can make you do just that!
- Once you have chosen all the right parameters, you can click “Generate” and the video will be created in a few seconds.
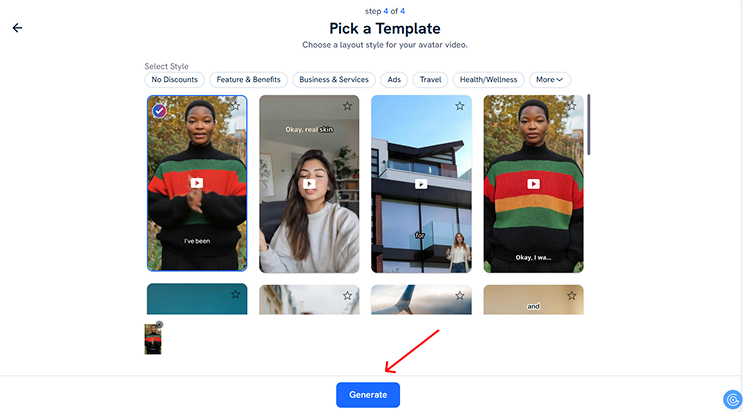
And that’s it! And the result? Well, take a look at it for yourself!

Now comes the Review Process
Although AI is the one who is going to be creating your content, you are still the one at the steering wheel. So, take the time to make sure the content is up to your brand standards.
Some of the questions that you can ask yourself to check whether they are good enough are:
- Are the visuals in alignment with your brand requirements?
- Are your brand elements positioned perfectly in the creatives?
- Are the designs professional?
- Is the post copy clear and convey the information properly?
- Are your hashtags relevant to the post?
- Are the subtitles and captions aligning with the content of the post?
If you get satisfactory answers to all of these questions and it passes your quality check, then the post is good to go. Which means, now we have to figure out the next important step, which is automation.
Boost Sales on Social Media with AI ⚡️
TRY NOW
Automating Ecommerce product posts with content scheduling
Okay, now that you have the content ready to go, it is time to get it published or scheduled so that it can go out at the right time, whether you are available or not. Predis AI has a feature for that as well, so let us walk you through the process on how you can schedule it.
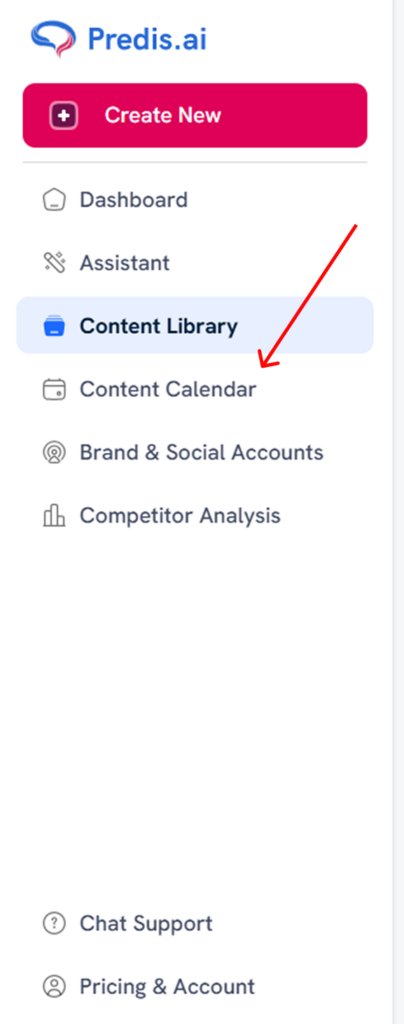
- First up, click on the “Content calendar” option in the left side menu.
- Then you will be taken to a built-in content calendar. In here, click on the date on which you want the post to go out.
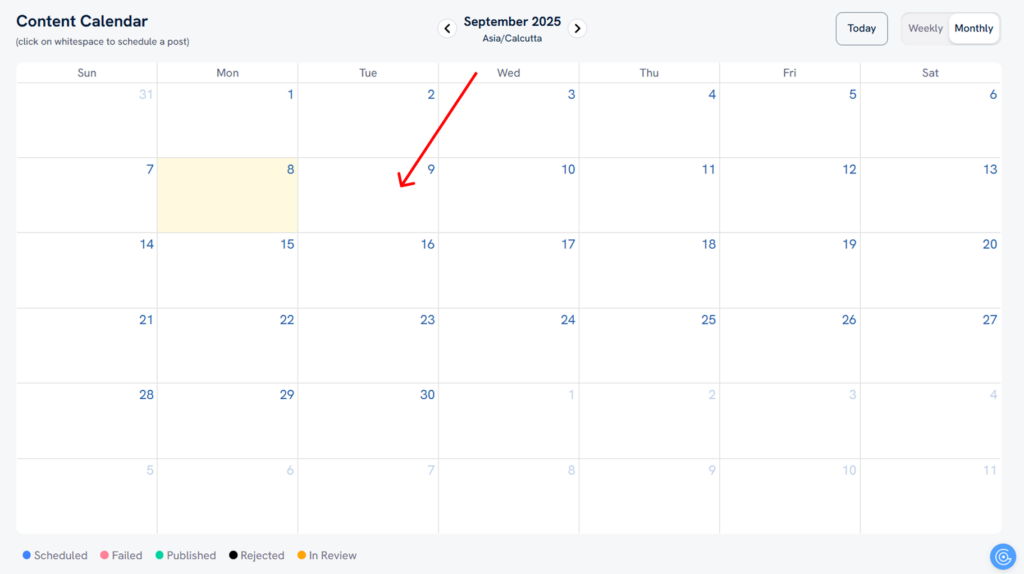
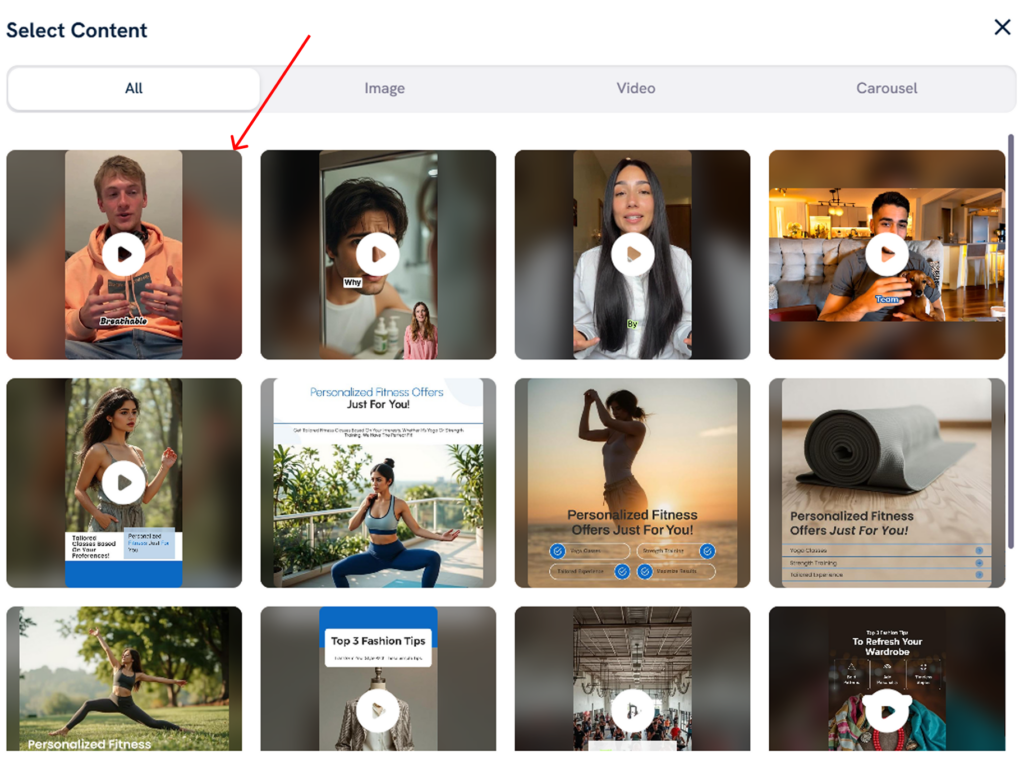
- Next up, you will be shown a pop-up in which you have to choose the content that you want to post that day. And since we have just created the content, you can pick that from the pop-up.
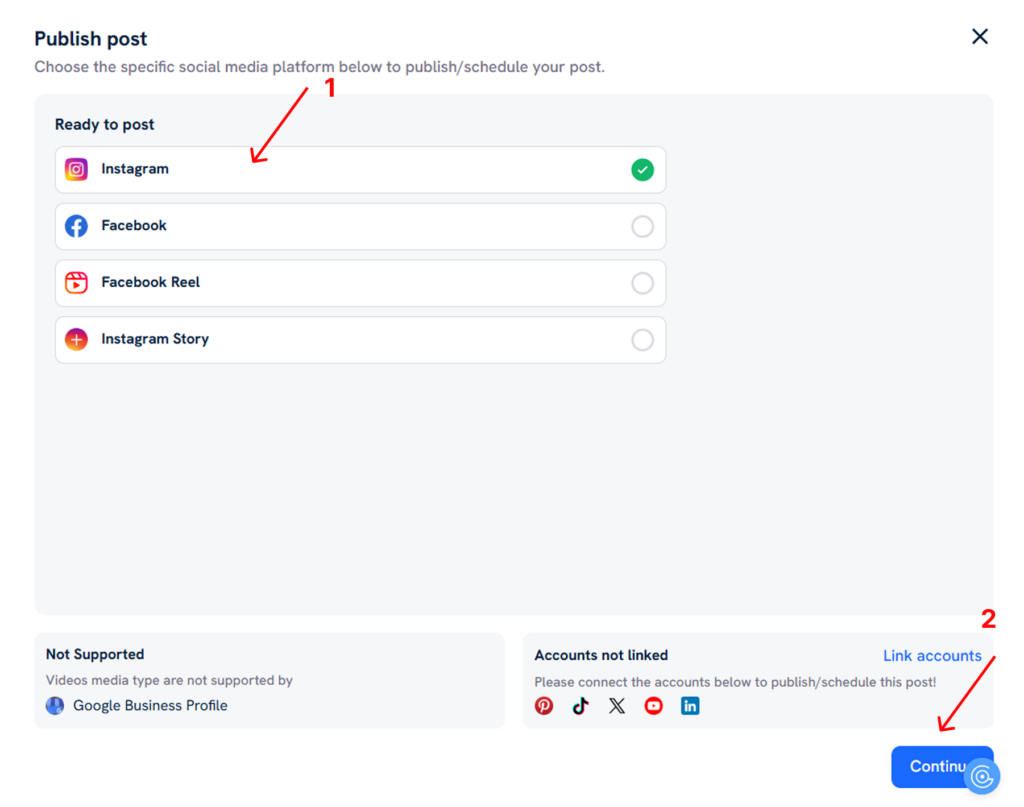
- After which, you need to have your social media accounts synced to Predis AI so you can get them automatically posted. If you haven’t connected it, take the time to do it now.
- Once you have connected your accounts, choose the social media on which you want to post.
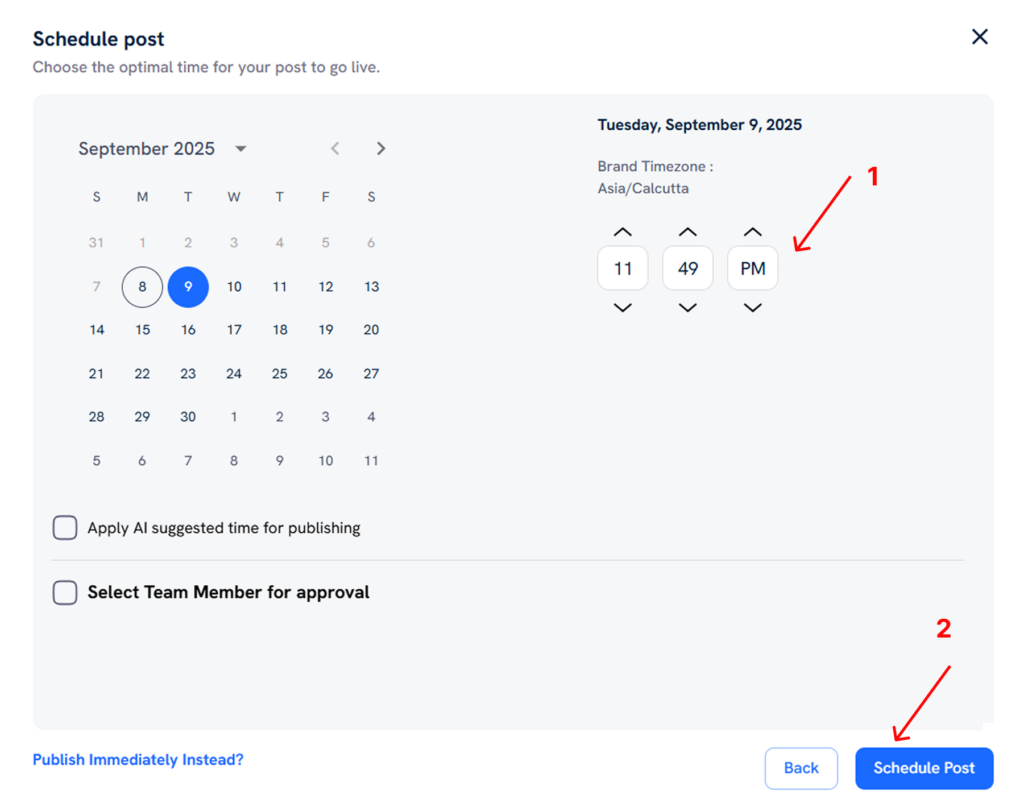
- Next up, you have to choose the time at which you want the post to go out. You can also get a team member to approve the post before it goes out.
- Once you have chosen everything, click “Schedule post”, and the post will be published at the stipulated time.
Best practices to keep in mind when creating Ecommerce product posts with AI tools
Now that we know how to create ecommerce product posts with AI, the next step is to figure out what best practices you have to adhere to to get the best possible results.
- Keep your brand guidelines in mind and make sure that the posts generated by the tool are in alignment with them. For example, it follows the brand colours, messaging style, and so on.
- Provide a detailed prompt to the AI tool to ensure that the post will match your expectations. If you have trouble writing a prompt, you can always get assistance from ChatGPT.
- Make sure that the product’s benefits shine through in the creative
- Does the content feel human? Or does it sound like a robot wrote it for you? Check the copy to see that and humanize it to make it sound natural and engaging.
- Cross-check the information to see that you are not overpromising on your product capabilities
- Keep an eye on analytics to see if the content is performing well with your audience. You can also cross-reference it with a human-made post to see which got the most engagement. This way, you will know what works and what does not.
Final Thoughts
Making ecommerce product posts for your business does not have to be a task that takes a lot of time out of your schedule. By strategically using AI tools in your workflow, this process can become much easier than you anticipate.
And with a versatile tool like Predis AI, you can get so much done in terms of product photoshoots, social media content, and even take care of admin tasks like scheduling. So, sign up for Predis AI today and automate your e-commerce content creation!
FAQ:
AI tools like Predis AI can automatically generate videos and auto-publish product-related content on your social media channels. This ensures that you post consistently while also saving time and resources.
Yes, many AI tools generate captions and hashtags alongside posts, making the whole process easier for you.