

In today’s digital marketplace, video is king when it comes to showing how a product works, engaging attention, and driving conversions. Rather than the old method of filming from scratch or hiring expensive studios, many brands are now leveraging tools that convert existing content (such as a URL or product feed) into polished explainer videos. This guide walks through how to generate a product explainer video from a URL (and/or CSV feed).
If you’re wondering where to start, what the workflow looks like, and how to get meaningful results (not just “nice to have” videos but ones that actually convert), this article covers it all.
What is an explainer video for products?
Before diving into the how-to, it’s helpful to understand what we mean by a “product explainer video”. This is a short video (often 30-90 seconds) that introduces a product, highlights its key benefits, shows how it works (or how to use it), and invites the viewer to take action (buy, subscribe, trial).
Explainer videos are especially effective because they engage both visual and auditory channels, reduce friction in understanding a product, and can often lead to higher conversion rates on pages where they are embedded.
Why use a URL or CSV-driven workflow instead of building from scratch?
Many brands still follow the older workflow: outline a script, hire or shoot video, edit, add voiceover, etc. But a URL/CSV-driven workflow offers major advantages:
- Speed: By pointing to an existing URL (web page, product page) or uploading a CSV of product data, the tool can automatically generate visuals, structure the script, and build scenes.
- Scale: If you have many products, uploading a CSV feed means you can generate hundreds of videos in a batch, rather than one by one.
- Consistency: Using templates and automation ensures brand colours, voice tone, font styles, and message structure stay consistent across videos.
- Cost efficiency: Less manual editing means lower cost and faster turnaround, allowing you to test more and iterate.
Step-by-Step: Generate a Product Explainer Video from a URL
Here is a detailed workflow you can follow (and adapt) to create a product explainer video starting from a URL.
1. Identify and prepare your source URL
Choose the web page (product page, landing page, blog post) that contains the core information about your product: name, features, benefits, images/videos, use-cases. Ensure the page is publicly accessible (not behind a login) and well-structured. Some tools can parse text and images automatically.
Before import, clean up the page if possible by removing irrelevant sections, making sure key messages are clear, and checking that your brand assets (logo, colour) are present.
2. Choose your tool and model the video template
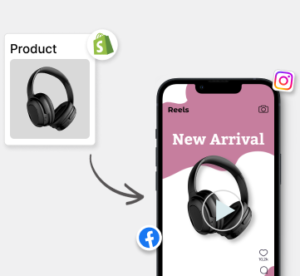
Select a video generation tool that supports URL input or CSV batch uploads. Ensure it allows customization of template, voiceover, branding, orientation (16:9, 9:16), etc. For instance, Predis supports CSV uploads for product video creation.
3. Link or upload your data
- If using a URL: Paste the link, let the tool parse it. It may extract headings, key images, and bullet lists.
- If using a CSV: Create a CSV file with columns such as product_name, description, image_url, price (optional), features, and benefit bullets.
- Map fields correctly: Ensure image URLs are correct, descriptions are concise, and brand metadata is consistent.
4. Let the tool generate a draft video
Once data is imported, many tools will auto-generate a draft video. The tool will pick stock visuals, fonts, voiceover, transitions, and build scenes from scratch.
Take a look at this draft video that was generated by Predis AI based on a simple text prompt:

At this point, review the draft: does it reflect your product message accurately? Does it align with your brand tone? If it does, then great, or else tweak the video as per your requirements.
5. Customize and polish
While automation gives you a base, customization helps it stand out. Key checks include:
- Replace generic stock visuals with product screenshots, logos.
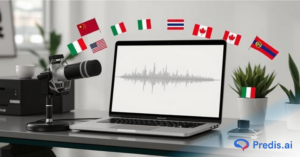
- Adjust voiceover by choosing a voice or uploading your own.
- Brand colours, fonts, and logo placement should be consistent.
- Edit scene order if needed. You might want to reorder features or add a customer testimonial.
- Choose length and orientation for social media; you might use 9:16 for the website hero section, 16:9. Some tools support auto-resize.
- Add captions/subtitles, as many viewers watch without sound.
- Ensure the CTA at the end is clear (e.g., “Start your free trial”, “Shop now”, “Learn more”).
6. Export and publish
Once you’re satisfied with the edits:
- Export the video in the required resolution (1080p is typically safe).
- Choose a platform like a website landing page, YouTube, or social media (Instagram, LinkedIn, TikTok).
- Make sure you upload appropriate formats and aspect ratios.
- If you used a CSV batch workflow, you may export multiple videos and schedule them via your social media management tool.
7. Monitor performance and iterate
Finally, treat your video like any digital asset: track metrics such as views, watch time, click-through rate, and conversions. Based on performance:
- If watch time is low in the first few seconds, revisit the hook.
- If the CTA click-through is low, test different wording or placement.
- For batch videos (via CSV), analyse which products perform better so you may adjust the template accordingly.
- Continuously refine visuals, voiceover speed, and length.
Boost Sales on Social Media with AI ⚡️
TRY NOW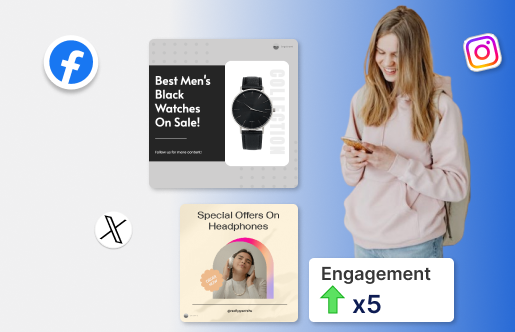
How to use Predis for batch product video generation
If you have a catalog of products and want to scale the video creation process, using a CSV upload feature is a game-changer. Here’s how you can do it specifically with Predis:
- Prepare your CSV: As per Predis’s guidelines, download their sample CSV, populate fields like product name, image URL, description, price, and other relevant columns.
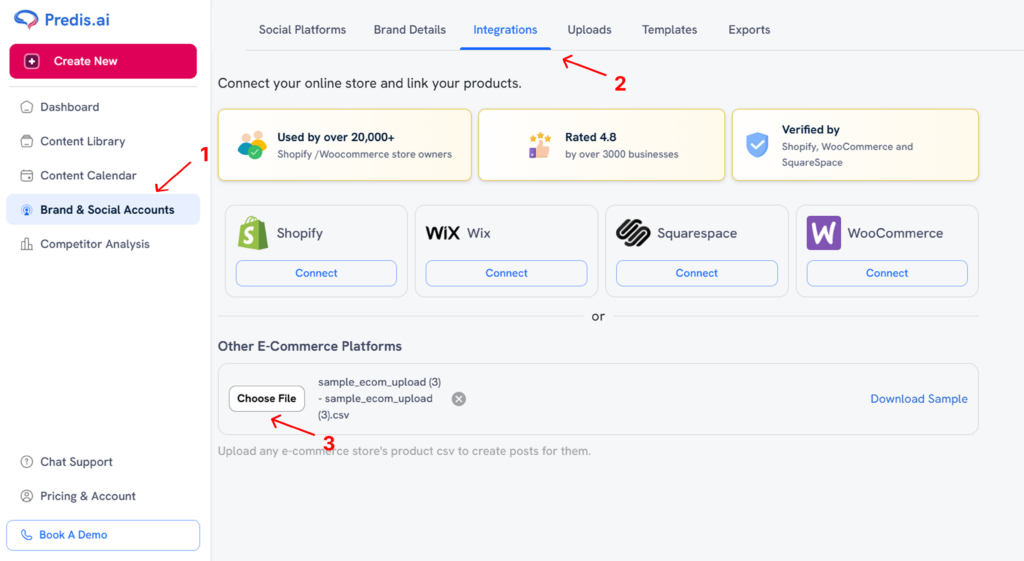
- Upload the CSV: In Predis, navigate to “Brand and Social Accounts” > Integrations > Upload CSV. The system will validate automatically.
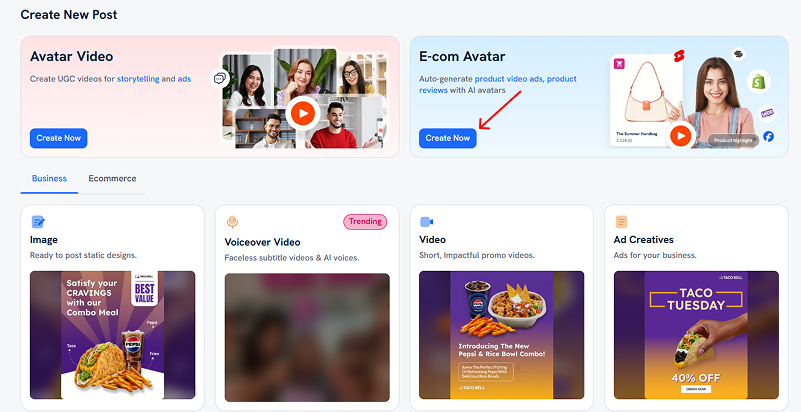
- Select creative type – Video: Choose “Product Videos” or “Ecom avatar” similar in the “Create New” section. Select the product(s) you want from the CSV.
- Generate and edit: Predis will create draft videos for each product row. You can edit each video individually if needed (adjust scenes, replace visuals).
- Download/schedule: Export the videos or schedule them via Predis’s publishing workflow.
- Scale analysis: Because you’ve batch-generated videos, you can run A/B tests across templates, visuals, and voiceovers to find what works best for certain product categories.
Using this CSV approach saves the manual overhead of video setup per product and maintains consistency across hundreds or thousands of content.
Best practices and common pitfalls
To make your product explainer videos effective, keep these best practices in mind (and avoid the common pitfalls):
Best practices:
- Start with a strong hook (first 5 seconds matter).
- Keep it concise (30–90 seconds for most audiences). Too long means drop-off.
- Focus on benefit for the viewer, not just features.
- Use captions/subtitles for silent viewers.
- Use brand-consistent visuals and voice.
- Test different versions (template, orientation), especially if using CSV batch.
- Optimize for mobile (vertical videos for social).
- Include a clear CTA at the end.
Common pitfalls:
- Relying purely on automation without reviewing/editing is wrong. Automation gets you started, but you still need to inject brand voice and ensure accuracy.
- Using too much text on screen (cluttered visuals) or too fast transitions can make it overwhelming. Viewers need time to absorb.
- Ignoring the first few seconds can be fatal. If you don’t engage the viewer early, watch time falls.
- Not customizing visuals because stock footage that doesn’t tie to your product weakens credibility.
- Skipping captions/subtitles can make viewers miss out on important details.
Other workflows worth considering
While the URL/CSV approach is powerful, here are a few other workflows that you can consider:
- Script-to-video: You write the script, then use an AI tool to animate it.
- Screencast/demonstration: if your product is a software tool, showing the screen with a voiceover is very effective.
- Mixed media: This is a combination of live-action + animation + voiceover for high-end products.
- Repurposing existing content: Convert blogs, webinars, or whitepapers into video via URL-to-video workflow.
You can use a hybrid strategy: batch-generate product videos via CSV for standard catalog items, and use script/creative workflows for flagship or high-value products.
Measuring success: what to track
To determine whether your explainer video strategy is working, monitor metrics like:
- View count and watch-time: If most viewers drop off early, you may need to improve the hook or shorten the video.
- Click–through: Did viewers click the CTA?
- Conversion rate: If the video is embedded on a product page or a landing page.
- Engagement metrics: likes, shares, and comments indicate viewer resonance.
- Batch comparison: if you generated many videos via CSV, compare templates, voiceover styles, and orientations to see what performs best per product category.
- Cost/time per video: Compare manual production vs the automated workflow to assess ROI (time saved, cost saved).
Use these insights to iterate on your video strategy — refine templates, adjust visuals, try different CTAs, vary lengths, and optimize for the platforms where you publish.
Conclusion
Generating product explainer videos from a URL or via CSV upload is a highly effective and scalable workflow in today’s video-driven content landscape. With tools like Predis offering CSV-based batch video generation and other platforms supporting URL-to-video conversion, you can rapidly produce consistent, brand-aligned video content across your product catalog.
FAQ
Generally, yes — many tools allow you to paste almost any publicly accessible URL (such as a blog post, product page, or article) and they will parse the content (headings, images, text) to generate a script and visuals. However, for the best results, you’ll want a page that has clear headings, images, and a strong message already present — pages that are poorly structured or full of extraneous content may yield weaker drafts.
A3: This depends on your audience and platform. As a general rule, keep product explainer videos between 30-90 seconds — this is long enough to explain but short enough to maintain attention.
For orientation: if you are embedding on a website or YouTube, 16:9 (landscape) works well. For social media (Instagram Reels, TikTok, Stories), 9:16 (vertical) is ideal. Some tools (including Predis) support multiple orientations or auto-resize features.