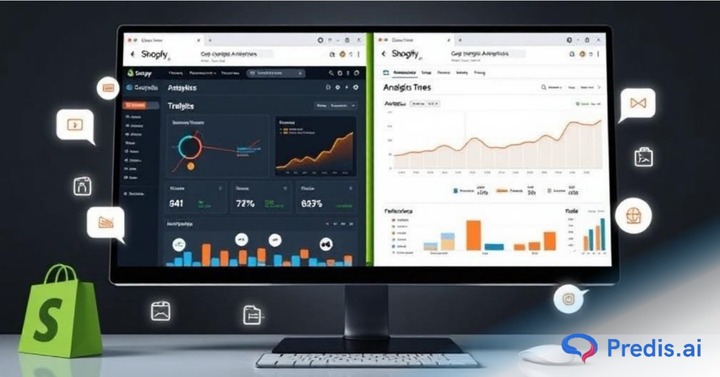
Have you got your online Shopify store all setup? Great! And now, what do you do? If you’ve wondered about how you can track all the visitors lurking on your website and how you can start targeting them, you’ve likely come to a solution. That solution is Google Analytics!
Using Google Analytics, you can track and analyze your website traffic, user behavior, and conversion rates.
Google Analytics combined with your Shopify store will bring you some insight into how visitors interact with your website, including information about their demographics, their sources, popular content, user engagement, conversion rates, and more. This helps you stay ahead of your competition and grow your e-commerce business.
All of this is possible through a tracking code used by Google Analytics that you place on your website’s pages. This code gathers information about user interactions and sends it to your Google Analytics account, where you can access and analyze the data through the Google Analytics dashboard.
Ultimately, this helps you make data-driven decisions to enhance customer experiences, increase conversions, and improve overall business success.
In this step-by-step guide, we will walk you through the process of adding Google Analytics to your Shopify store.
Step I: Adding Google Analytics to Shopify
1. Create a Google Analytics account
- Go to the Google Analytics website
- Sign in with your Google account or create a new one
- Once you’re logged in, click on the “Start measuring” button.

- You will be prompted to set up an account. Enter an Account Name (this is a name that represents your business or website) and other relevant details. Make sure to enter accurate information.
- Click on “Next” to proceed.
2. Get your Google Analytics tracking ID
- After creating the account, you’ll be prompted to set up a property. A property represents your website or app. Enter the Website Name, Website URL, Industry Category, and Reporting Time Zone.
- Click on “Create” to proceed.
- In the Admin section of your Google Analytics account, under the Property column, click on “Tracking Info” and then select “Tracking Code.”
- You’ll see your Tracking ID displayed at the top of the page. It will look like “UA-XXXXXXXXX-X.” Copy this tracking ID; you’ll need it to integrate Google Analytics with your Shopify store.
- Keep your tracking ID secure. It’s a unique identifier for your website’s data collection. Treat it like a password.
Step II: Adding Google Analytics to Shopify
1. Access your Shopify admin dashboard
- Log in to your Shopify account.
- Once logged in, you’ll be in your Shopify admin dashboard.
- In the left-hand menu, click on the “Online Store” section to expand it.
- From the expanded menu, select “Preferences.”
2. Enter your Google Analytics tracking ID
- Scroll down within the Preferences section until you reach the “Google Analytics” section.
- In the Google Analytics section, you’ll see an option to “Manage Pixel.” Click on this option.
- A pop-up window will appear. Click on “Connect your Google account.”
- You’ll be redirected to Google to authorize Shopify’s access to your Google Analytics account. Sign in with the Google account that has access to your Google Analytics.
- Once authorized, you’ll see a list of Google Analytics properties associated with the connected Google account. Select the Tag ID for the GA4 property that you want to connect to your Shopify store.
- After selecting the appropriate GA4 property, click on “Connect your Google Analytics 4 property.”
3. Enable Enhanced e-commerce Tracking (optional)
- Enabling enhanced e-commerce tracking provides more detailed insights into your store’s sales and product performance. It’s recommended for e-commerce stores.
- If you want to enable enhanced e-commerce tracking, go back to the Google Analytics section on the Shopify page.
- Within the Google Analytics section, you’ll find an “Enable Enhanced E-commerce” checkbox. Click on this checkbox to enable enhanced e-commerce tracking.
- Once enabled, click the “Save” button at the bottom of the page to apply the changes.
Step III: Verifying the Integration
Check if Google Analytics is tracking your Shopify store
- Go back to your Google Analytics account.
- In the left-hand menu, navigate to the “Real-Time” section. This section allows you to see live data about the current activity on your website.
- Open your Shopify store in a new tab or window using your website’s URL.
- In the Google Analytics Real-Time section, you should see active users on your site. This will confirm that Google Analytics is tracking your Shopify store in real time.
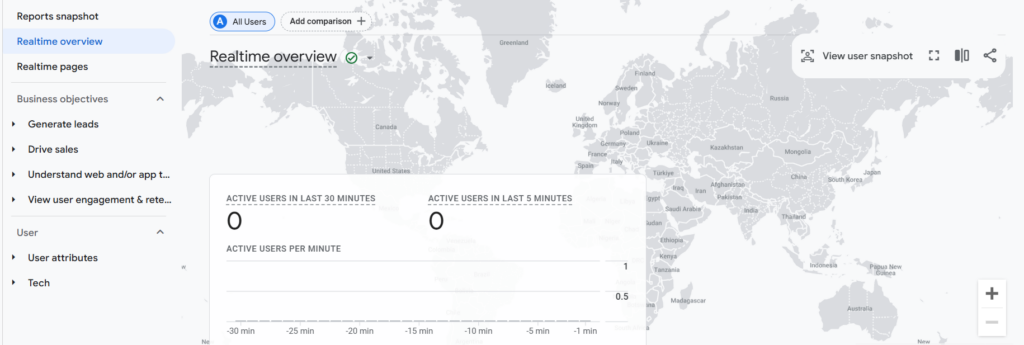
- Note that there might be a slight delay in real-time tracking data appearing in Google Analytics. Don’t be alarmed if there’s a brief delay between site interactions and data showing up in the Real-Time report.
Test e-commerce Tracking (optional)
- Add a Product to Your Shopify Cart: Visit your Shopify store as a regular customer. Browse through your products and add one to the cart.
- Proceed to the Checkout Page: Go through the process of proceeding to the checkout page.
- Complete a Test Purchase: If you’re comfortable doing so, you can complete a test purchase. This involves entering test payment information and completing the checkout process without actually making a real payment.
Make sure you’re using a testing environment and not an actual live transaction. You don’t want to affect your actual sales data.
- Check E-commerce Data in Google Analytics: After performing the test purchase, go back to your Google Analytics account. Depending on the specific GA4 setup and reporting, navigate to the relevant section where you can find e-commerce data.
Look for data related to the test product added to the cart, the checkout process, and the completed purchase.
Step IV: Analyzing Your Shopify Store’s Data with Google Analytics
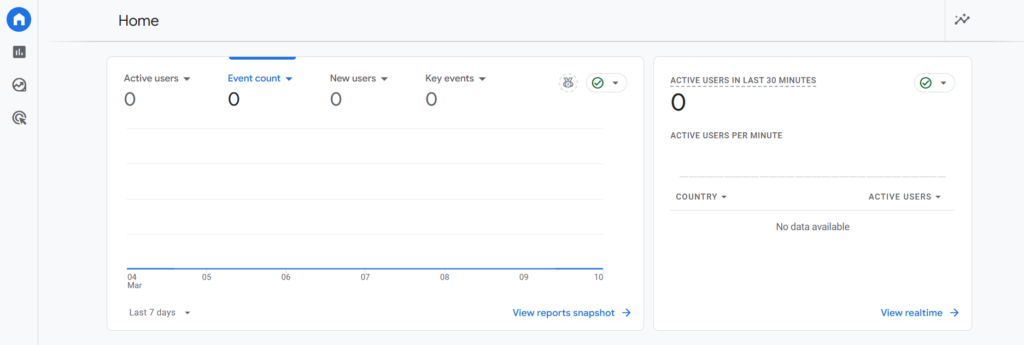
Overview of Google Analytics reports
- Dashboard: Get a comprehensive understanding of your store’s performance, including essential metrics like sessions, conversion rate, and revenue. All of these are crucial for you to assess your store’s overall performance at a glance.
- Real-Time: Monitor the live activity on your website, such as active users, top pages, and traffic sources. This will help you stay on top of new trends and immediately capitalize on the opportunity.
- Audience: Understand your website visitors, including their demographics, interests, and behavior. These elements help you gain the knowledge you need to tailor your marketing efforts to meet their preferences.
- Acquisition: Track the sources of your website traffic and measure the effectiveness of your marketing campaigns. This can even be done across channels.
- Behavior: This helps you gain insight into how users navigate through your website, including popular pages, exit pages, and site searches.
- Conversions: This metric measures the success of your goals and tracks e-commerce transactions. This helps you understand what exactly drives up your sales.
Key Metrics To Track
Understanding these key metrics will help you refine your strategy to its best potential:
- Sessions: The number of times users visit your website. This is a basic measure of understanding engagement.
- Conversion rate: The percentage of visitors who complete a desired action, such as making a purchase. That is a clear indication that the user got what they were looking for.
- Average order value: The average amount spent by customers in a single transaction. Using this metric, you can optimize your pricing strategies.
- Revenue: The total amount of sales generated by your Shopify store. Understanding this number will help you grow your sales and business in the future.
- Traffic sources: Identify where your website traffic is coming from, such as organic search, social media, or paid advertising. Once you get the hang of it, you can look into channel allocation and refining your marketing campaigns.
Creating Custom Reports And Goals
- Custom reports: Using Google Analytics, you can build custom reports to track specific metrics or segments of your audience. Then, you can extract the data that matters the most to your business.
- Goals: Set up goals to track specific actions on your website, such as newsletter sign-ups or product purchases. Tracking these actions will essentially help you understand user interaction and conversion success.
Boost Shopify Sales with Social Media 🤩
MAKE POSTS WITH AIStep V: Using Data to Optimize Your Shopify Store
Adding Google Analytics and reading the data doesn’t mean anything until you take active steps toward performance improvement.
Identify Opportunities For Improvement
- Analyze customer behavior to identify pain points and areas for improvement. Using data mining techniques within Google Analytics can help uncover deeper trends in customer interactions.
- Identify products or pages that are struggling to engage users or convert. Turn these insights into actionable improvements.
A/B Testing and Optimization
- Test different variations of your website to optimize conversion rates. Compare variations, learn from the data, and refine your website experience.
- Use data from Google Analytics to make educated decisions. Numbers don’t lie, and when coupled with strategic thinking, they can take your store to new heights.
Here is the Google Analytics for Beginners Tutorial:
Why Not Just Use Shopify Analytics?
As a business store owner on Shopify, you may have seen the native analytics option on your admin control panel. Shopify does provide you with a fundamental analytics feature, but it comes nowhere close to the insight that Google Analytics can generate for your business.
Take, for example, the integration and collation of Google Analytics insight with that of Google Ads and Google Search. The SEO and tracking capabilities of this setup alone are enough to move from Shopify analytics to that of Google, especially when supported by some of the best ETL tools for seamless data flow.
However, you need to consider that there are inbuilt firewalls and settings in Shopify that prevent Google’s nose from prying into the business and activity of your store, so you may need to work around that.
Long story short, if your store is thriving fine with just a bird’s-eye view of the analytics, Shopify’s native solution is good enough. However, if you would rather be poised for growth and need to understand every nook and cranny of your store, bring Google in.
With the help of the Predis.ai Social Media Ad Copy Generator, you can not only create captivating social media ads but also analyze their performance to refine your marketing strategies further.
3 Key Benefits Google Analytics Provides Over Shopify Analytics
It is a good decision to make the switch for the benefit of your online store, not only because of better analytics but also because information is power. In the competitive online world of businesses, the more information you have about your customer’s interaction, the better strategies you can formulate to help the store grow.
The following three advantages make Google Analytics a worthy consideration as an alternative to Shopify Analytics:
- While Shopify analytics provides insight into your customers, products, orders, inventory, and sales, Google Analytics does more. You get information on how a visitor is behaving on your web pages, their customer journey, and even marketing analytics. In addition to providing the fundamental information, you get access to in-depth metrics as well.
- Shopify analytics is prone to showing some discrepancies in numbers, which could prove to be detrimental when you are trying to run a business. You may find different numbers reported in unique visitor counts, for example. In comparison, Google Analytics is more reliable, consistent, and accurate.
- Let’s face it – Shopify isn’t the only eCommerce option available on the internet. If you decide to scale your operations up in the future and set up your own dedicated website, Shopify may not allow you to migrate the analytics and data to the new store. This is where Google Analytics comes in handy. The migration is easy and streamlined without any loss.
Understanding Google Analytics Reports
Google Analytics offers a treasure trove of reports, each revealing a unique aspect of your store’s performance. Let’s explore some key reports:
- Dashboard: Get a bird’s-eye view of your store’s health with essential metrics like sessions, conversion rate, and revenue. This snapshot allows you to quickly gauge overall performance.
- Real-Time: Ever wondered what’s happening on your site right now? Real-time reports show active users, top pages being viewed, and traffic sources. This lets you capitalize on trends and identify potential issues as they occur.
- Audience: Demystify your visitors! Audience reports reveal demographics, interests, and user behavior patterns. Understanding your audience empowers you to tailor marketing efforts to their preferences.
- Acquisition: Where’s your traffic coming from? Acquisition reports track the sources of your website traffic, including organic search, social media, and paid advertising campaigns. Analyze the effectiveness of each channel and optimize your marketing spend.
- Behavior: How are visitors navigating your store? Behavior reports shed light on popular pages, exit pages, and site searches. Use these insights to identify areas for improvement and streamline the user journey.
- Conversions: Are visitors taking the desired actions? Conversion reports track specific goals, such as newsletter sign-ups or product purchases. This helps you measure the success of your marketing efforts and identify what drives sales.
Troubleshooting Common Integration Issues
Integrating Google Analytics with your Shopify store is a straightforward process, but occasional technical hiccups can happen. Here’s a breakdown of some common issues and solutions to get you back on track:
- Double-check Tracking Code: A typo in the Google Analytics tracking code you pasted into your Shopify settings is a common culprit for data collection failures. Ensure you’ve copied and pasted the code accurately.
- Verify Google Account Permissions: The Google account you’re using to connect Google Analytics with Shopify needs the proper permissions to access your store’s data. Head over to your Google account settings and confirm that authorization is granted.
- Clear Browser Cache: Cached data in your browser can sometimes disrupt tracking functionality. Try clearing your browser cache and then revisiting your Shopify store to see if the integration starts working.
- Check for Conflicting Apps: Certain Shopify apps might have unintended consequences and interfere with Google Analytics tracking. If you suspect this might be the case, temporarily disable any recently installed apps to see if the issue resolves.
- Seek Help from Google Analytics Support: Google offers a wealth of support resources dedicated to Google Analytics. If you’re still facing problems after trying these troubleshooting steps, don’t hesitate to reach out to their support team for further assistance.
Wrapping It Up
Integrating Google Analytics with your Shopify store unlocks a treasure trove of customer insights. By leveraging the power of data, you can optimize your store for a better user experience, higher conversions, and, ultimately, a thriving e-commerce business.
With this guide as your roadmap, you’re well on your way to harnessing the power of Google Analytics and taking your Shopify store to the next level.

⭐️⭐️⭐️⭐️⭐️
Best Shopify app for Social Media Marketing
Predis.ai is an AI-powered platform designed to empower e-commerce businesses with advanced analytics and marketing automation. Sign up for a free account today!
Related articles
Marketing Automation for Shopify
How To Connect Instagram To Shopify Store
Best Shopify Tools For Marketing


