

When it comes to Instagram Stories in today’s era, standing out requires more than simply visually appealing content. Sound has become so important. When you use your own audio, your storytelling can become more engaging and genuine. This is true whether you are a creator, a brand, or just someone who wants to add a personal touch to their presentations. In this blog post, we will walk you step by step on how to add your own audio to Instagram Stories using a variety of methods, ranging from in-app capabilities to third-party tools. Additionally, this article will also provide you with expert advice on how to make your material sparkle.
Why Add Custom Audio to Instagram Stories?
Your simple story may be easily transformed into an emotional, on-brand experience by just adding audio to it! Here’s what makes it worthwhile:
- It helps to increase audience engagement. Stories with unique, emotional, or branded audio are more likely to elicit a tap, reply, or share.
- Custom jingles, voiceovers, and narration can help to underline your brand’s individuality.
- Audio provides context, emotion, and clarity that static images or quiet videos cannot. Audios help to tell deeper and more powerful stories!
- Many content creators are already experiencing increased retention and brand recall when adding voiceovers or bespoke background tracks instead of the default Instagram music.
Things to Know Before You Start
You need to keep the below mentioned essential requirements in mind to avoid last minute surprises:
- Instagram Story length: Your audio should be trimmed according to the Instagram story length as each story lasts 15 seconds long.
- Audio formats: Instagram supports videos with embedded audio in formats like MP4 or MOV. Hence, make sure your audio format is correct.
- Copyright rules: Always use original or royalty-free audio to avoid being muted or flagged for infringing copyright claims.
- In-app vs. external editing: Instagram allows basic voiceovers, but external apps provide better control and effects.
How to Add Your Own Audio to Instagram Stories?
Option 1: Make use of the In-App Voiceover Function on Instagram.
If you are creating a story on Instagram, you can very easily record the same with an audio. Here’s how:
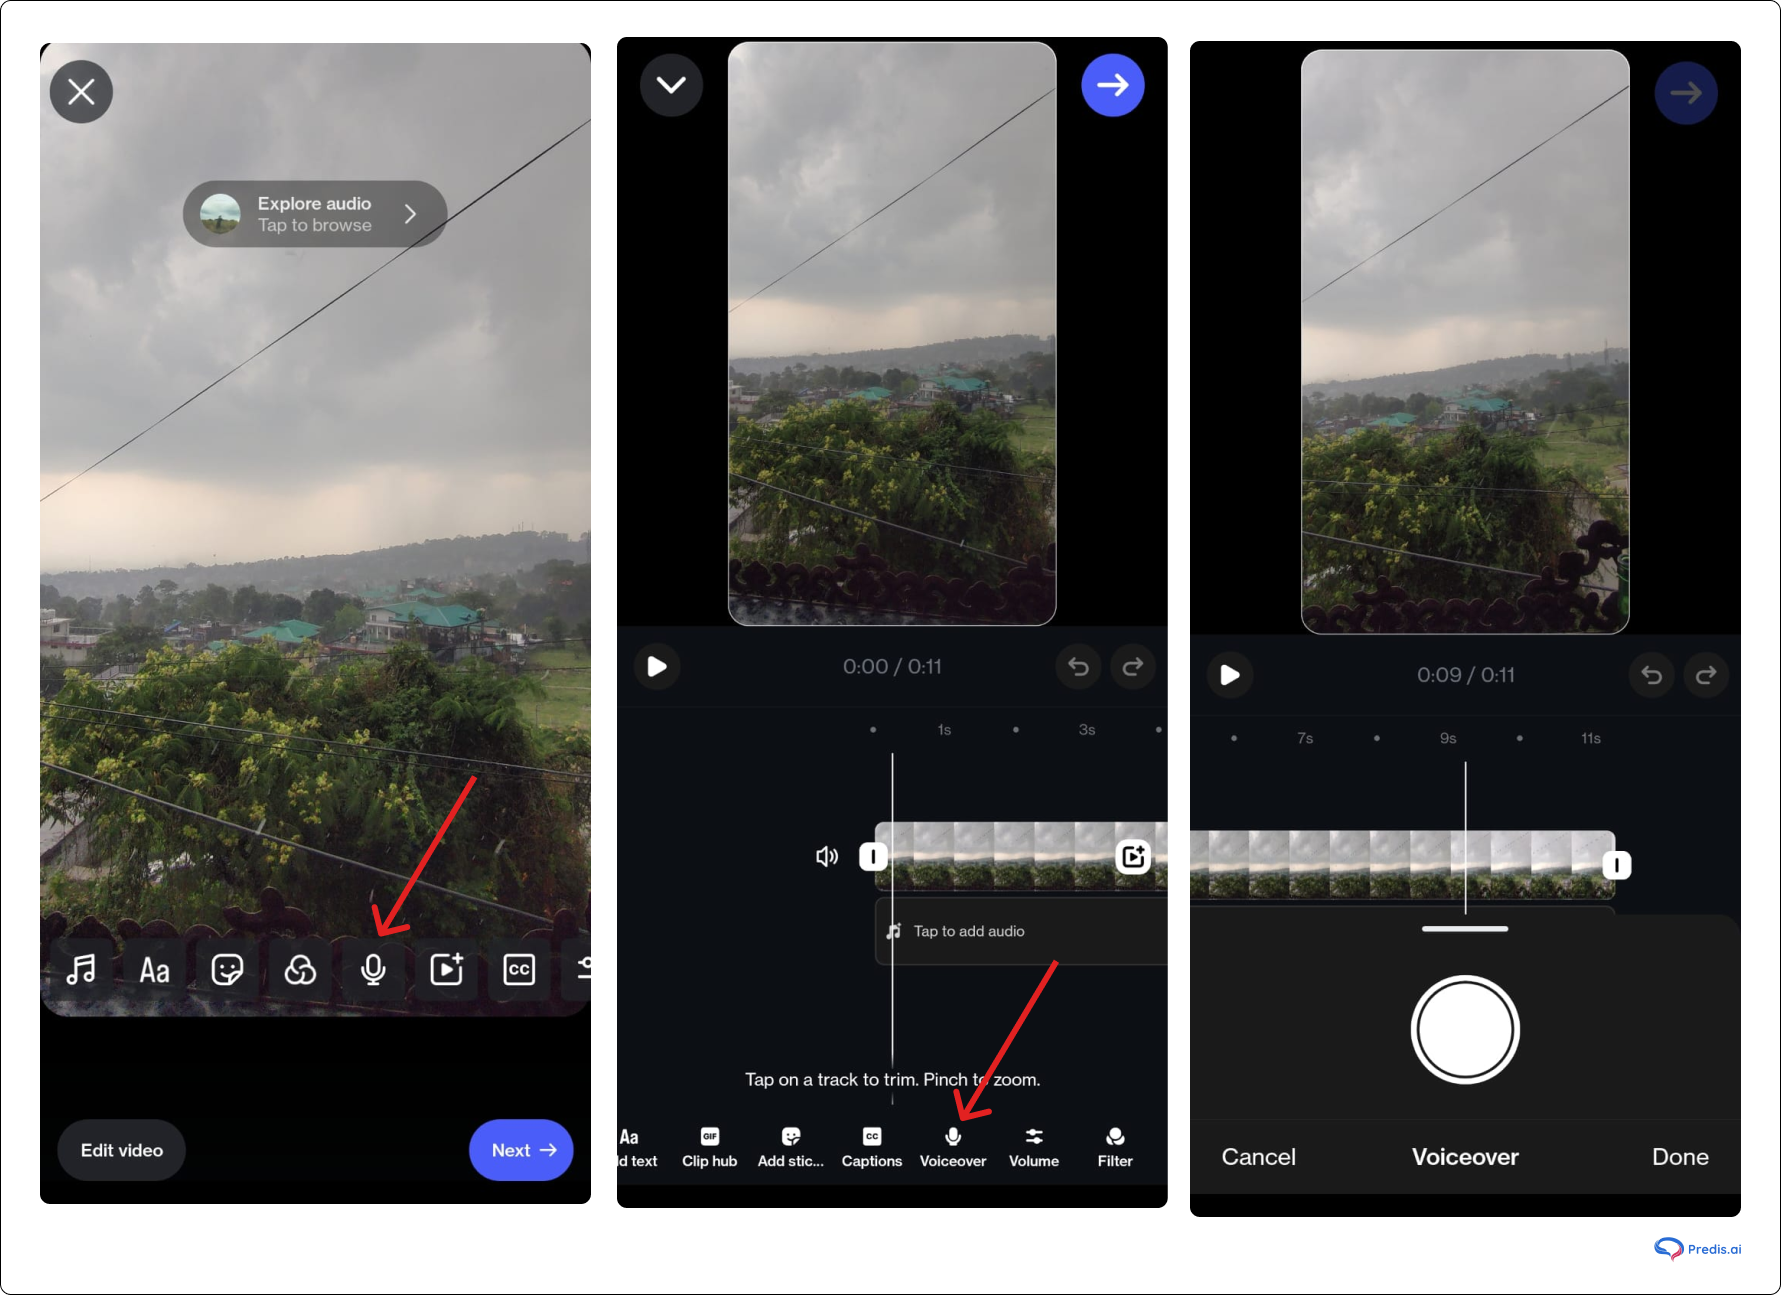
- Record a video or upload one from your gallery to Instagram.
- Tap edit video at the bottom.
- At the bottom, tap Voiceover.
- Press and hold the mic icon to record your voice.
- Tap or hold the mic icon to record audio over the video, tap Done and finish sharing your reel.
- Note that you can record more than one voiceover clip for your reel.
- Use the slider bar to edit where you want your voiceover to start.
- To remove the voiceover clip you recorded, tap the voiceover track, then tap Discard. (Source: Instagram blog)
Option 2: Add Custom Audio Using Third-Party Apps
If you want to add background music, edit volume levels, or sync audio to visuals, you should try to use apps like Predis AI, InShot, CapCut, or VN Video Editor.
Here’s how you can add audio using Predis AI
- Go to the Predis.ai website and log into your account
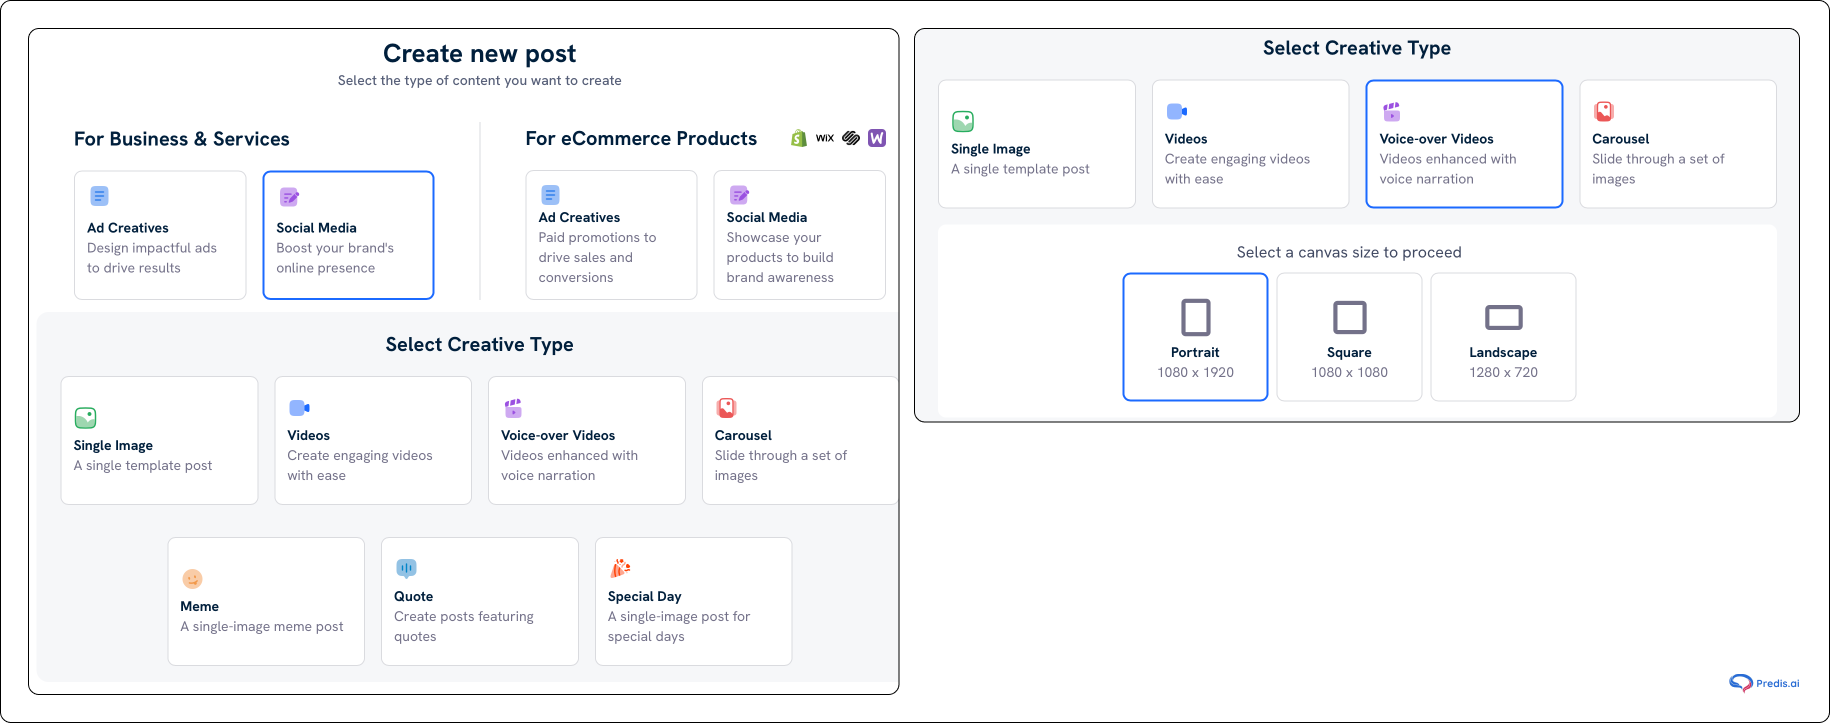
- Create new post and select the type of content you want to post.
- Select “Voice-over-videos” from creative type and choose the canvas type according to your needs.
- You can also upload the video or use already given templates, as shown below.
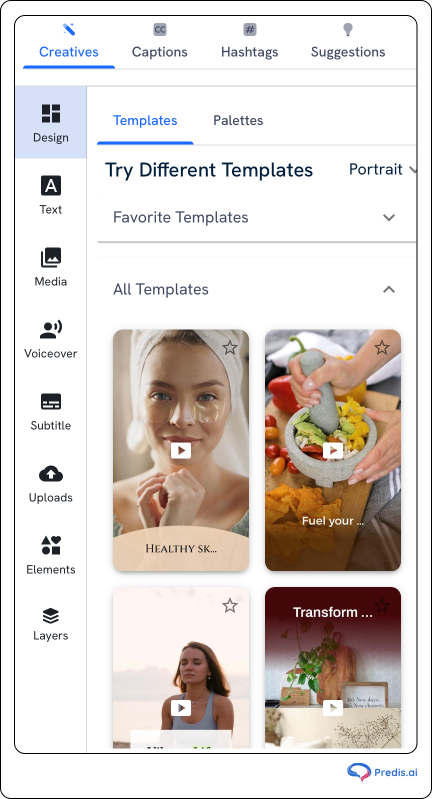
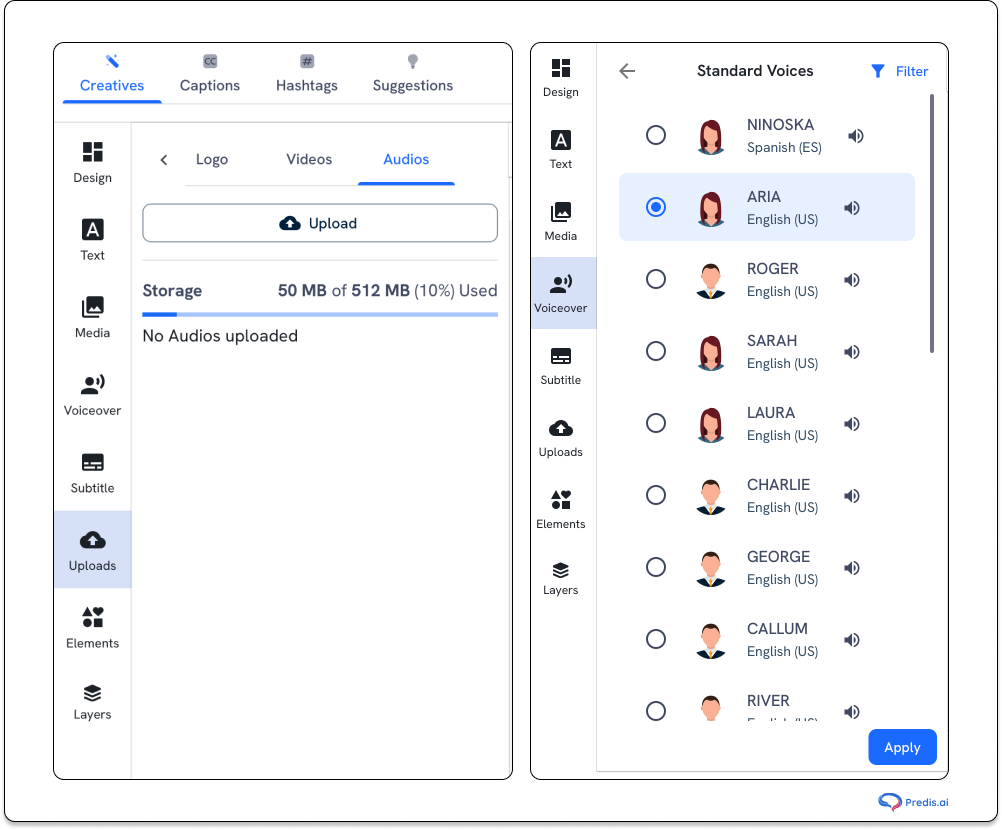
- Under voiceover, you can change the speed and also choose the type of voice you want for your videos, refer to the image shown below:
- Predis will create the final outcome along with the caption, as shown in the image below:
- If everything’s good to go, you can hit Publish.

Option 3: Use Reels to Add Audio and Share as a Story
This is a little hack that many creators can use:
- Go to Instagram Reels and start a new video.
- Tap the music note to add custom audio or record your voice while filming.
- You can edit with text, transitions, and effects.
- After publishing the story, tap the share icon and choose “Add to Story.”
- Using Reels gives you access to more editing tools while still reaching your Story audience.
Best Practices for Using Custom Audio on Stories
Follow the below audio best practices, to make your story memorable and optimized for reach:
- Use subtitles: Many viewers often watch reels without sound. Hence, adding text overlays improves accessibility and engagement.
- Ensure audio clarity: For ensuring audio clarity, use a quality mic or phone with noise cancellation.
- Don’t overpower visuals: Keep the volume balanced so the message is clear.
- Keep it concise: Short, snappy audio works best for 15-second limits.
- Match audio to emotion: Use background tracks that complement the mood—upbeat for announcements, soft for behind-the-scenes, etc.
How To Fix Common Instagram Audio Issues?
Even with perfect preparation, things can go wrong. Let’s see how to fix common issues:
- In case your audio is not syncing! You can edit your video in a third-party app to lock the audio before uploading.
- Are your stories getting muted? Worry not! This usually happens due to copyright detection. You should always stick to original or royalty-free music.
- No music sticker? Music stickers may not be available in all regions or account types. Using Reels or editing externally is a good workaround.
Tools and Resources to Create Your Own Audio
To make high-quality custom audio, you don’t always need an expert studio. You can easily record, edit, and improve any sound for your Instagram Stories if you have the right tools. Here is a list of things that can help you get started.
Apps for Editing Audio
These apps have a lot of tools that you can use to improve your voiceovers or background music:
- GarageBand for iOS: This app is great for making your own background music or putting together layers of different audio clips. It’s good for both new and experienced people.
- Audacity: You can use Audacity (Windows/Mac) to edit audio in great depth. It is free and open-source software. You can cut, fade, and improve sound with great accuracy.
- CapCut: is a mobile editing app that lets you edit music on multiple tracks at once. It works great for putting music in sync with overlays or changes.
- Predis.ai: Predis.ai is mostly known for providing AI-powered tools for making visual content, but now it also lets you plan audio content. It can figure out what background music goes best with the images in your story and match them automatically. It can also quickly write voiceover lines that fit your brand’s tone.
Royalty-Free Music Libraries
It is very important to use licensed or royalty-free music so that material doesn’t get muted or taken down. Here are places you can trust:
- Pixabay Music: has a lot of free music tracks in a lot of different styles that can be used for both personal and business purposes.
- Epidemic Sound: has a big library of high-quality music that you can use for free with a subscription.
- YouTube Audio Library: is a free place to find background music and sound effects that are great for new artists.
Voice Recording and Audio Tools
When recording your own voice or live audio, having the appropriate gear makes a significant difference:
- Lavalier Microphone: A clip-on microphone designed for crisp mobile recordings, making it ideal for makers on the go.
- USB Condenser Microphone: Ideal for desktop use, providing studio-quality audio for narrations and tutorials.
- Dolby On: is a free mobile app that improves voice clarity and minimizes background noise with a single tap.
By combining these tools with careful planning, you can produce beautiful audio for your Instagram Stories.
Conclusion
Adding your own audio to Instagram Stories isn’t just a cool trick—it’s a storytelling upgrade. Whether you’re narrating a tutorial, dropping a product teaser, or just sharing a vibe, your voice can make the moment stick. By following the steps above—plus using the right tools and best practices—you’ll be able to create Stories that are not only seen but heard, remembered, and acted on.