


With 136,000 photos uploaded every minute on Facebook, it’s easy to get tagged in pictures you don’t want on your profile. Whether it’s an unflattering shot, an old memory, or just a post you’d rather keep private, knowing how to hide tagged photos on Facebook can help you control your digital presence.
Luckily, Facebook offers privacy settings that let you manage who can see the photos you’re tagged in. You can adjust your tagging settings, enable tag reviews, or hide tagged posts from your timeline. In this guide, we’ll walk you through the step-by-step process of hiding tagged photos on both the desktop site and mobile app. Let’s get started!
Hide Tagged Photos on Facebook on the Desktop Site
If you want to hide tagged photos on Facebook, you can adjust your privacy settings and enable tag review to control what appears on your profile. Here’s how you can manage your tagged posts on the desktop site.
1. Edit the Settings for Tagging on Facebook
You can limit who sees the posts where you’re tagged by modifying your profile and tagging settings. Follow these steps to hide tagged photos from your Facebook timeline:
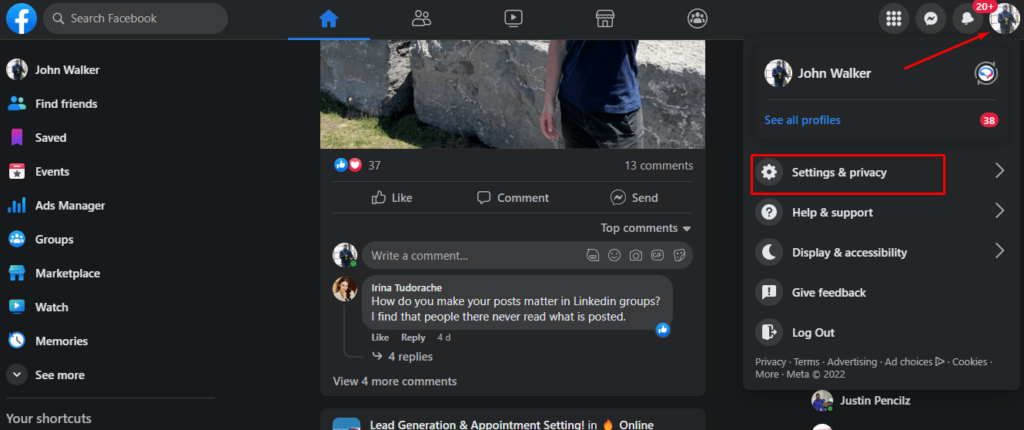
- Step 1: Click your profile photo in the upper-right corner of Facebook.
- Step 2: Select “Settings & Privacy”, then click “Settings”.
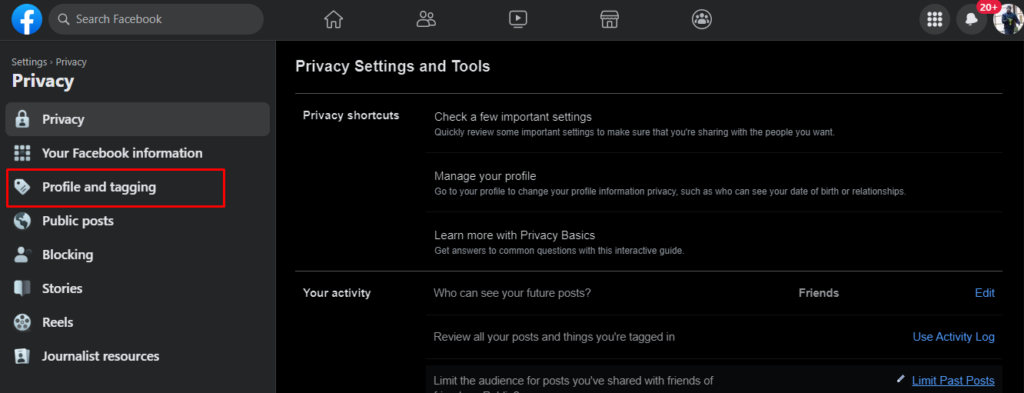
- Step 3: In the left menu, go to “Profile and Tagging” under the “Audience and Visibility” section.
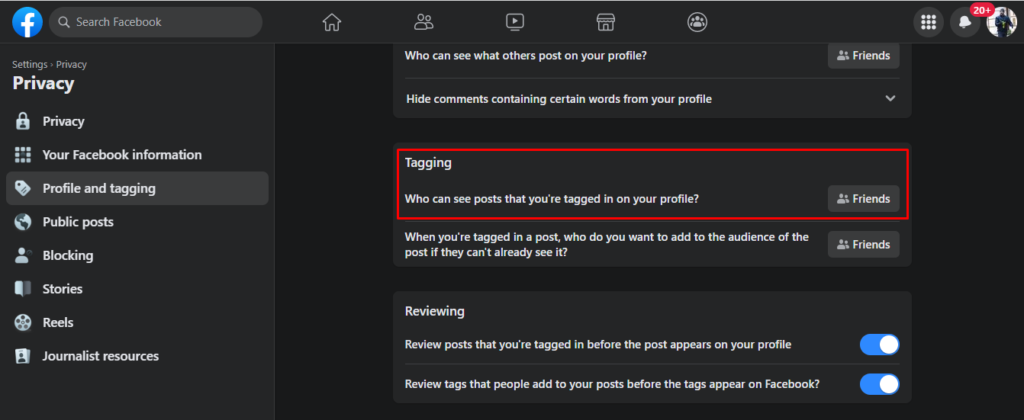
- Step 4: Find the option “Who can see posts you’re tagged in on your profile?”
- Step 5: Click on the Save button after choosing your preferred audience (e.g., Only Me, Friends, or Custom).
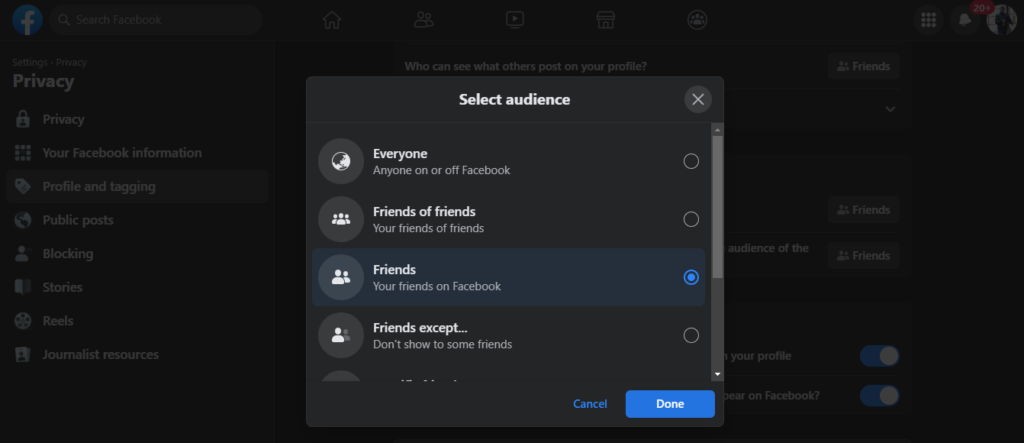
By adjusting these settings, you can control who can view your tagged photos, preventing unwanted posts from being visible to everyone.

2. Enable the Reviewing Option Before Tagging
If you want to approve tags before they appear on your profile, enable the Tag Review feature. This ensures that no tagged photos are added to your timeline without your consent.
- Step 1: Go to “Settings & Privacy” and select “Settings”.
- Step 2: Click “Profile and Tagging” in the left menu.
- Step 3: Scroll down to the “Reviewing” section.
- Step 4: Enable “Review posts that you’re tagged in before they appear on your profile”.
- Step 5: Turn on “Review tags people add to your posts before they appear on Facebook”.
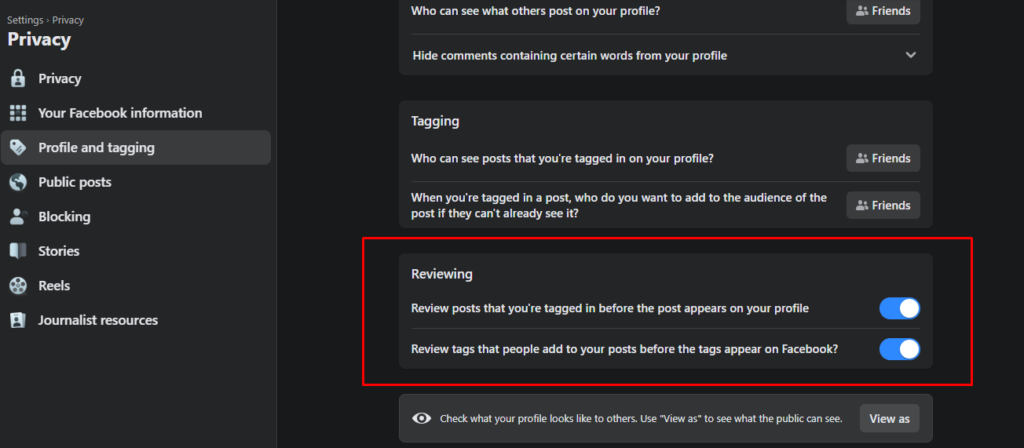
With this setting, you’ll get notifications whenever someone tags you, allowing you to approve or remove the tag before the post appears on your timeline.
By using these features, you can hide your tagged photos on Facebook and control how others tag you in posts. Whether you’re managing your personal profile or a brand presence through a mobile event app, these settings help maintain your privacy. Next, let’s explore how to do the same on the Facebook mobile app!
Use Predis AI to create Facebook posts and
 automate your Image and Caption Generation using Facebook Post Generator.
Hide Tagged Photos on Facebook with Mobile App
If you’re using Facebook on your phone, you can easily hide tagged photos by adjusting your privacy settings. The mobile app gives you full control over who can see your tagged posts. Follow these simple steps to manage your tagged photos on Facebook from your smartphone.
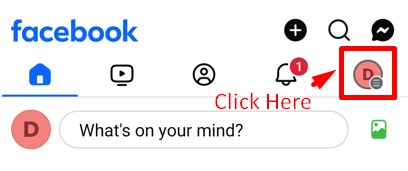
- Step 1: Tap on the profile picture icon with three horizontal lines (menu icon) in the top right corner of the Facebook app.
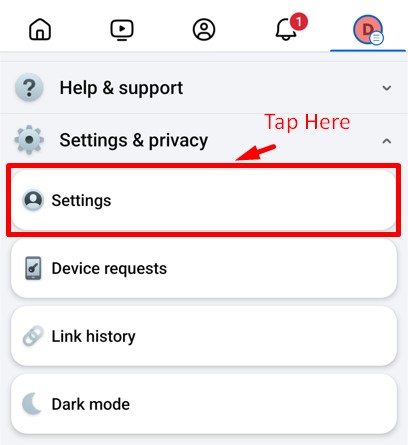
- Step 2: Scroll down and tap “Settings & Privacy”, then select “Settings” from the dropdown menu.
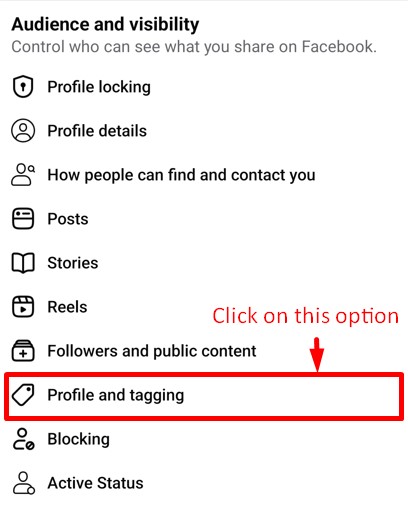
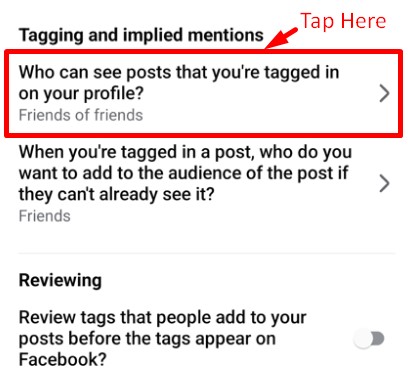
- Step 3: Under the “Audience and Visibility” section, tap “Profile and Tagging” to access tagging settings.
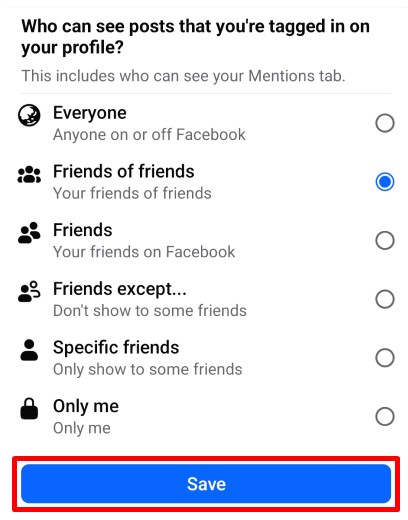
- Step 4: In the “Tagging and implied mentions” section, select “Who can see posts that you’re tagged in on your profile?”
- Step 5: Choose your preferred audience (Only Me, Friends, or Custom) and tap “Save” to confirm the changes.
Once updated, your tagged photos will no longer be visible to unwanted viewers. If you want even more control, you can enable Tag Review, which lets you approve or deny tags before they appear on your timeline.
Now that you know how to hide tagged photos on Facebook using both the desktop site and mobile app, let’s wrap up with some key takeaways!
Stand Out on Facebook with AI Content 🌟
Conclusion
Keeping control over your tagged photos on Facebook is essential for privacy and reputation management. Whether you want to limit who sees your tagged posts or review tags before they appear, Facebook offers easy-to-use settings for both desktop and mobile users.
By following the steps in this guide, you can hide tagged photos on Facebook, prevent unwanted posts from appearing on your profile, and decide who gets to see your tagged content. Plus, enabling Tag Review ensures that nothing gets posted without your approval.
Having sorted tagging, are you ready to take your social media game to the next level? Look no further than Predis.ai! Transform your content creation, breeze through post-scheduling, and let the magic of AI supercharge your engagement. Sign up now!
Frequently Asked Questions
There are three possible outcomes.
The image owner either untagged you.
Alternatively, the photographs in which you were tagged may have been deleted from Facebook.
The last option is that the image’s owner has banned you on Facebook.
On Facebook, a recent update has tweaked the process of tag removal, making it a bit less straightforward. However, fear not – you can still untag someone.
Here’s the drill: Locate the photo in question and hit the tag option situated at the top right corner.
Type the name of the person you wish to untag, select their name, hit the untag button, and wrap it up by clicking the save option.
No, remember that once you’ve successfully untagged yourself on Facebook, the rules are clear – they’re not allowed to tag you again. If they happen to review their images and notice your absence, attempting to tag you again will reveal that you deliberately untagged yourself.
It is unlikely, as they were already on your timeline. Your friend might have assumed it got posted, unaware that your tags are set to “approval only.” If you decide to showcase it on your timeline, it will solely show up in your feed, not theirs.
Related Content,
Learn To Tag Someone on Facebook Easily