


High-quality visuals alone aren’t enough to create an engaging experience clear audio is just as crucial. Whether you’re producing a YouTube tutorial, a business presentation, or a personal vlog, crisp and noise-free audio enhances professionalism and effectively communicates your message. Poor audio quality can be distracting, making it difficult for viewers to focus on the content.
Background noise such as wind, traffic, electrical hums, or even keyboard clicks can significantly diminish a video’s quality. Unwanted noise can make dialogue unclear, reduce engagement, and give your content an amateur feel. Even if your video is visually stunning, bad audio can cause viewers to click away or struggle to understand what’s being said. This is especially problematic for professionals, educators, and content creators who rely on video to convey important information.
Fortunately, cleaning up background noise doesn’t have to be complicated. Whether you’re a beginner or an experienced editor, several easy-to-use tools and techniques can help you remove unwanted noise and improve audio clarity. In this blog, we’ll walk you through a step-by-step process on How to Remove Background Noise from a Video, ensuring it sounds as professional as it looks.
The Rise of AI to Clean Background Noise from a Video

Before answering the question “How to Remove Background Noise from a Video?” Let’s understand how AI-based noise reduction is a game-changer. It automates what used to be a tedious and time-consuming process. Traditional methods involved manually selecting noise profiles, applying filters, and fine-tuning equalizers. While effective, these techniques required both expertise and patience.
AI, on the other hand, leverages machine learning algorithms to detect and remove unwanted sounds intelligently. These systems are trained on vast datasets of audio, allowing them to distinguish between background noise and human speech with incredible accuracy.
- Speed & Efficiency: AI eliminates the need for manual noise profiling, making the process faster and more accessible.
- User-Friendly: Even those without audio editing experience can achieve professional-quality results.
- Real-Time Processing: Some AI tools work live, improving audio quality during video calls and live streams.
- Consistent & High-Quality Results: AI continuously learns and improves, delivering better accuracy over time.
Instead of relying on manual adjustments, AI tools analyze audio in real time, isolating voices while eliminating disturbances seamlessly.
How to Remove Background Noise from a Video | Steps To Follow
1. Choose the Right Software
The first step in cleaning background noise from a video is selecting the right software. Depending on your level of expertise and the tools available, you can choose from:
- Professional Video Editing Software: Adobe Premiere Pro, Final Cut Pro, Power Director, and DaVinci Resolve come with built-in noise reduction features that allow precise control over audio cleanup.
- Audio Editing Software: Audacity (free) and Adobe Audition are great for advanced noise removal by isolating and filtering unwanted sounds.
- AI-Powered Tools: Apps like Descript, Krisp, and VEED.io offer quick, automated noise reduction using AI tools, making them a great option for beginners.
For clear understanding, we’ll use Audacity Software as an example.
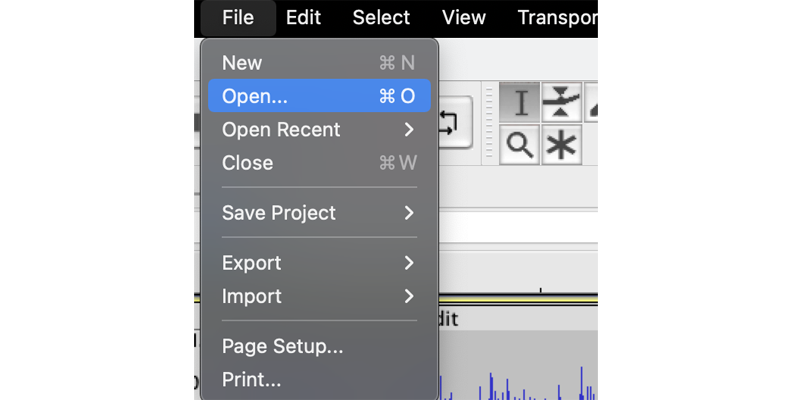
Step 1: Open Your Audio File
- Launch Audacity on your computer.
- Click on the File menu and select Open.
- Browse your computer and choose the audio file you want to edit.
Shortcut:
- Windows: Press
CTRL + O - Mac: Press
COMMAND + O
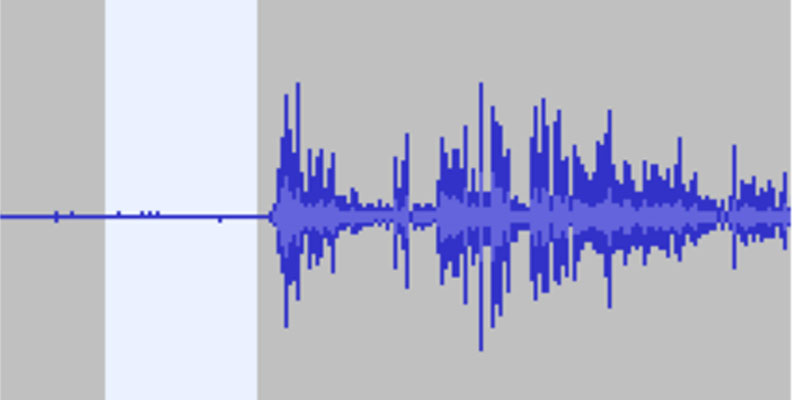
Step 2: Select a Noise Sample
- In your audio track, find a section that contains only background noise (silence or ambient sound). Ideally, this should be a part of the recording where no speech or important sounds are present.
- Click and drag with your mouse to highlight this portion of the track.
- This selection will serve as the Noise Profile, allowing Audacity to identify and remove similar background noise from the entire recording.
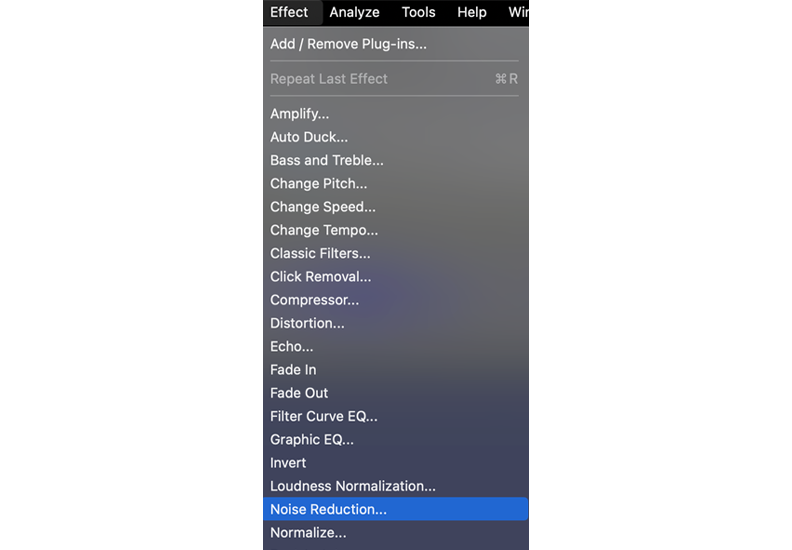
Step 3: Create a Noise Profile
- Go to the Effects menu.
- Select Noise Reduction from the list.
- In the pop-up window, click Get Noise Profile.
Once you click this, Audacity will analyze the selected portion and create a noise signature. This will help distinguish unwanted noise from the actual voice or sounds in the recording.
Step 4: Apply Noise Reduction
- Select the entire track or just the section where you want to remove background noise.
Shortcut:
- Windows: Press
CTRL + A - Mac: Press
COMMAND + A
- Go to the Effects menu again and choose Noise Reduction.
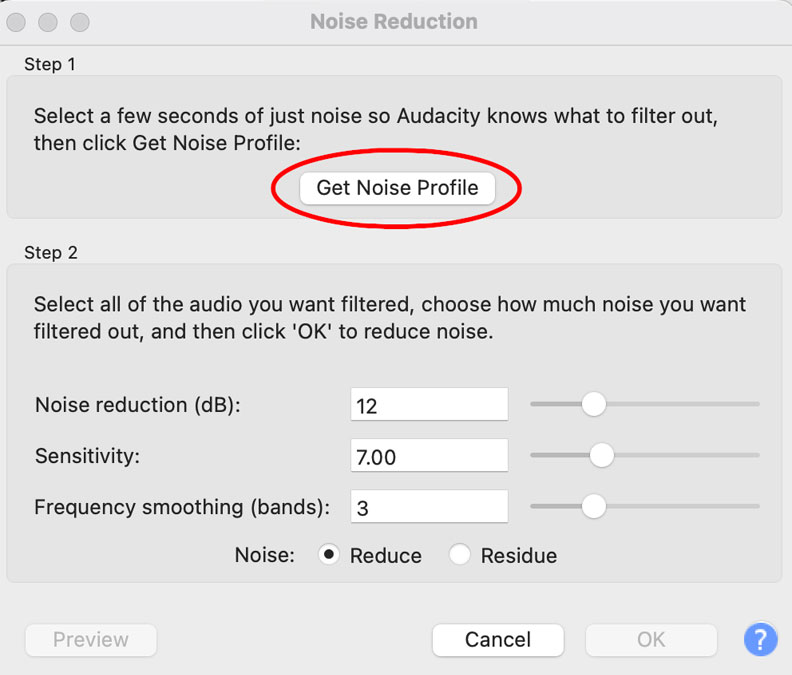
Step 5: Adjust Noise Reduction Settings
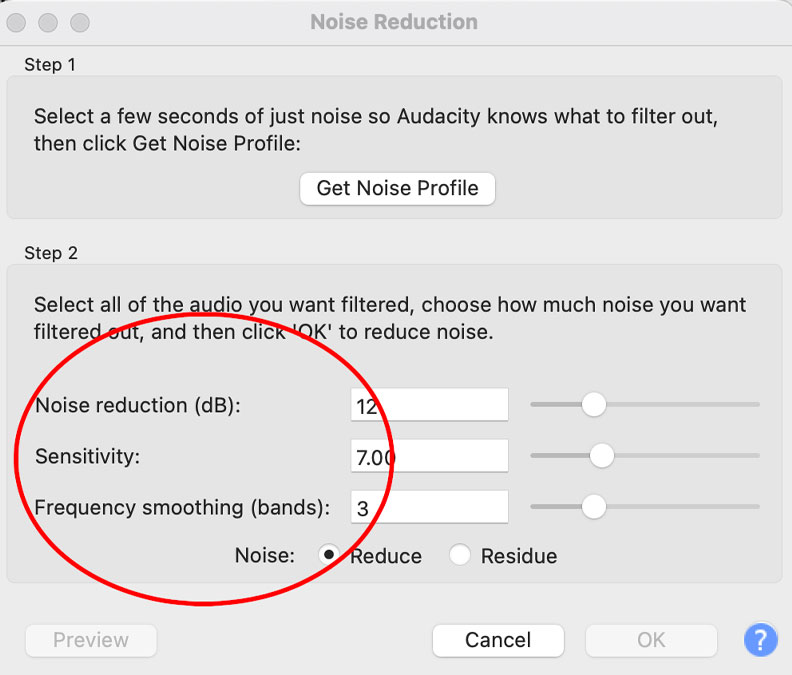
In the Noise Reduction dialog box, you will see three main controls:
- Noise Reduction (dB) – Determines how much background noise is reduced. A good starting point is 6 dB, but you can adjust as needed.
- Sensitivity – Controls how much of the audio is considered noise. A higher value removes more noise but can also distort the original sound. Try to keep this as low as possible while still removing unwanted noise.
- Frequency Smoothing (bands) – Helps smooth out the noise reduction across different frequencies. If your recording is already clean, set this to 0. If you hear artifacts or distortion, increase it slightly.
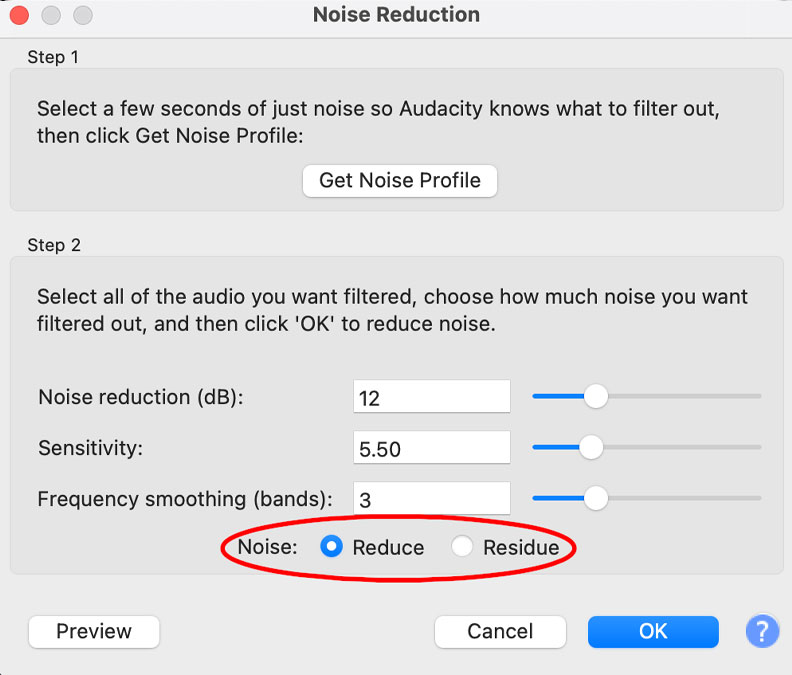
Step 6: Preview and Apply Changes
- Under Noise, select Reduce (default setting).
- Click Preview to listen to the changes before applying them.
- If necessary, tweak the settings until you achieve the best balance.
- Once satisfied, click OK to apply the noise reduction.
Step 7: Save Your Cleaned Audio File
After the noise reduction has been applied, save your file:
- Click File > Export to save the edited version.
- Choose the desired file format (MP3, WAV, etc.).
- Name your file and save it to your preferred location.
If there is still some unwanted noise after the first pass, you can repeat the noise reduction process with slightly adjusted settings. However, be cautious not to over-process, as this can make the recording sound unnatural.
Conclusion
Certain tools used transform a simple text into stunning Instagram, TikTok, Facebook, and YouTube videos with AI voiceover, background music, and stock videos in seconds. Think of the wonderful ways in which certain tools help in clearing unnecessary sounds from your video.
Clear audio is just as important as high-quality visuals when creating engaging video content. Background noise can be distracting and lower the overall professionalism of your video, making it difficult for viewers to focus on your message. Fortunately, with the right tools and techniques, you can effectively clean up unwanted noise and enhance audio clarity.
By choosing the right software whether professional video editing tools like Adobe Premiere Pro, dedicated audio programs like Audacity, or AI-powered solutions like Descript, you can find a noise reduction method that suits your skill level and needs. Importing your video, identifying noise profiles, applying noise reduction effects, and fine-tuning with equalizers all contribute to improving sound quality. Taking the time to preview and make necessary adjustments ensures that speech remains clear and natural, avoiding any distortions caused by excessive noise removal.
Cleaning up background noise doesn’t have to be complicated. With a few simple steps and the right approach, you can significantly improve your video’s audio quality, making it more professional and enjoyable for your audience. Whether you’re creating content for social media, business presentations, or personal projects, these techniques will help you achieve cleaner, clearer sound.